14.1.1.4 API Key 기반 인증 Config File 설정
유저가 OCI CLI의 Config File 설정을 위해서 크게 API singing key 기반 인증과 토큰 기반 인증이 있습니다. (OCI에 배포된 인스턴스와 자원을 위해서는 다른 추가적인 방법도 있습니다.) API singing key 기반 인증은 OCI 유저의 API Key에 사용할 Private Key, Public Key 키쌍을 생성하고 등록하여, 인증시 사용하는 방법입니다. OCI 유저 정보에 API Key가 등록된 상태에는 리프레쉬없이 지속해서 사용할 수 있습니다.
-
필요한 정보
-
Tenancy OCID
-
User OCID
-
API Key
-
Region
-
필요한 정보 수집하기
-
OCI 콘솔에 로그인합니다.
-
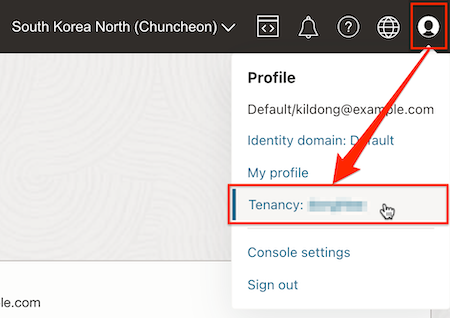
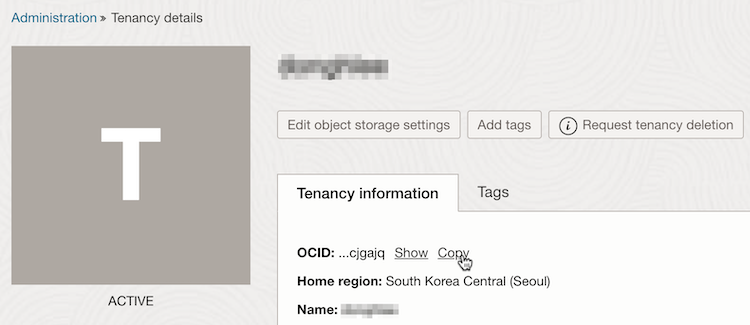
Tenancy OCID
오른쪽 위 사용자 Profile에서 Tenancy 클릭 후 Tenancy OCID 확인
-
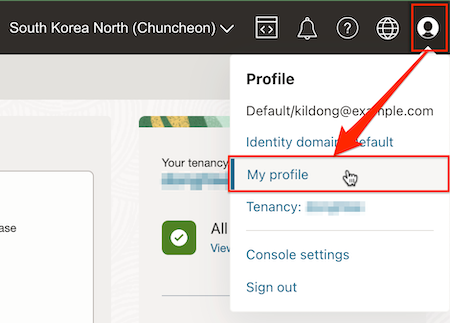
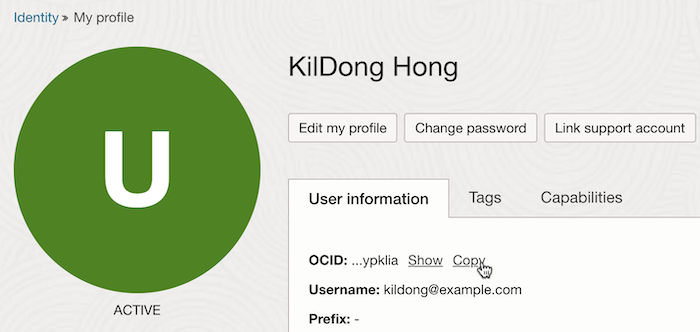
User OCID
오른쪽 위 사용자 Profile에서 My profile 클릭 후 사용자 OCID 확인
OCI CLI Config 설정하기
-
OCI CLI로 다음 명령을 실행합니다.
oci setup config-
파일 생성 위치: 디폴트 값 사용
-
user OCID: 수집한 값 입력
-
tenancy OCID: 수집한 값 입력
-
region: 원하는 대상 리전 선택
-
API Signing RSA key pair 생성: Y 입력
-
API Signing RSA key pair 생성 위치 및 이름: 디폴트 값 사용
-
passphrase for your private key: N/A 직접 타이핑
-
실행 예시
$ oci setup config
    This command provides a walkthrough of creating a valid CLI config file.

    The following links explain where to find the information required by this
    script:

    User API Signing Key, OCID and Tenancy OCID:

        https://docs.cloud.oracle.com/Content/API/Concepts/apisigningkey.htm#Other

    Region:

        https://docs.cloud.oracle.com/Content/General/Concepts/regions.htm

    General config documentation:

        https://docs.cloud.oracle.com/Content/API/Concepts/sdkconfig.htm


Enter a location for your config [/home/opc/.oci/config]:
Enter a user OCID: ocid1.user.oc1..aaaaaaaa2wn4ujlahfmgz43ewnw5cwd6jprf5tqjvhosngi4klnbdva56nia
Enter a tenancy OCID: ocid1.tenancy.oc1..aaaaaaaaclknekr6cdqy47khigggtgn64ylnrwylriccevpolcwfn3cjgajq
Enter a region by index or name(e.g.
1: af-johannesburg-1, 2: ap-chiyoda-1, 3: ap-chuncheon-1, 4: ap-dcc-canberra-1, 5: ap-hyderabad-1,
6: ap-ibaraki-1, 7: ap-melbourne-1, 8: ap-mumbai-1, 9: ap-osaka-1, 10: ap-seoul-1,
11: ap-singapore-1, 12: ap-sydney-1, 13: ap-tokyo-1, 14: ca-montreal-1, 15: ca-toronto-1,
16: eu-amsterdam-1, 17: eu-dcc-dublin-1, 18: eu-dcc-dublin-2, 19: eu-dcc-milan-1, 20: eu-dcc-milan-2,
21: eu-dcc-rating-1, 22: eu-dcc-rating-2, 23: eu-frankfurt-1, 24: eu-jovanovac-1, 25: eu-madrid-1,
26: eu-marseille-1, 27: eu-milan-1, 28: eu-paris-1, 29: eu-stockholm-1, 30: eu-zurich-1,
31: il-jerusalem-1, 32: me-abudhabi-1, 33: me-dcc-muscat-1, 34: me-dubai-1, 35: me-jeddah-1,
36: mx-queretaro-1, 37: sa-santiago-1, 38: sa-saopaulo-1, 39: sa-vinhedo-1, 40: uk-cardiff-1,
41: uk-gov-cardiff-1, 42: uk-gov-london-1, 43: uk-london-1, 44: us-ashburn-1, 45: us-chicago-1,
46: us-gov-ashburn-1, 47: us-gov-chicago-1, 48: us-gov-phoenix-1, 49: us-langley-1, 50: us-luke-1,
51: us-phoenix-1, 52: us-sanjose-1): 3
Do you want to generate a new API Signing RSA key pair? (If you decline you will be asked to supply the path to an existing key.) [Y/n]:
Enter a directory for your keys to be created [/home/opc/.oci]:
Enter a name for your key [oci_api_key]:
Public key written to: /home/opc/.oci/oci_api_key_public.pem
Enter a passphrase for your private key ("N/A" for no passphrase):
Repeat for confirmation:
Private key written to: /home/opc/.oci/oci_api_key.pem
Fingerprint: e0:c4:3f:c6:bc:d2:7a:b4:33:a4:c9:90:73:d3:cd:58
Config written to /home/opc/.oci/config


    If you haven't already uploaded your API Signing public key through the
    console, follow the instructions on the page linked below in the section
    'How to upload the public key':

        https://docs.cloud.oracle.com/Content/API/Concepts/apisigningkey.htm#How2


$
-
-
생성된 config 파일을 보면 아래와 같이 생성된 API Signing Key를 기반으로 하고 있습니다.
$ cat .oci/config [DEFAULT] user=ocid1.user.oc1..aaaaaaaaxxxxxxxxxxxxxxxxxxxxxxxxxxxxxxxxxxxxxxxxxxxxxxxxxxxx fingerprint=e0:c4:3f:c6:bc:d2:7a:b4:33:a4:c9:90:73:d3:cd:58 key_file=/home/opc/.oci/oci_api_key.pem tenancy=ocid1.tenancy.oc1..aaaaaaaaxxxxxxxxxxxxxxxxxxxxxxxxxxxxxxxxxxxxxxxxxxxxxxxxxxxx region=ap-chuncheon-1 -
.oci 폴더에 config 파일과 Private Key, Public Key가 생성되었습니다.
$ ls -la ~/.oci/
total 12
drwx------. 2 opc opc   73 May 10 03:09 .
drwx------. 7 opc opc  188 May 10 03:08 ..
-rw-------. 1 opc opc  302 May 10 03:09 config
-rw-------. 1 opc opc 1704 May 10 03:09 oci_api_key.pem
-rw-------. 1 opc opc  451 May 10 03:09 oci_api_key_public.pem
API Key 등록하기
-
오른쪽 위 사용자 Profile에서 My profile 클릭합니다.
-
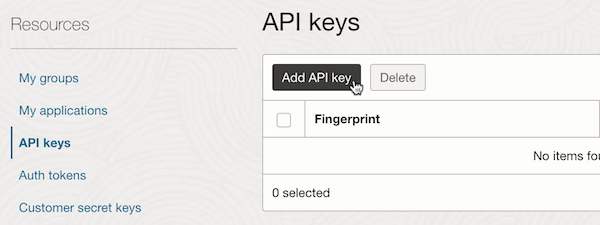
Resources > API keys를 선택합니다.
-
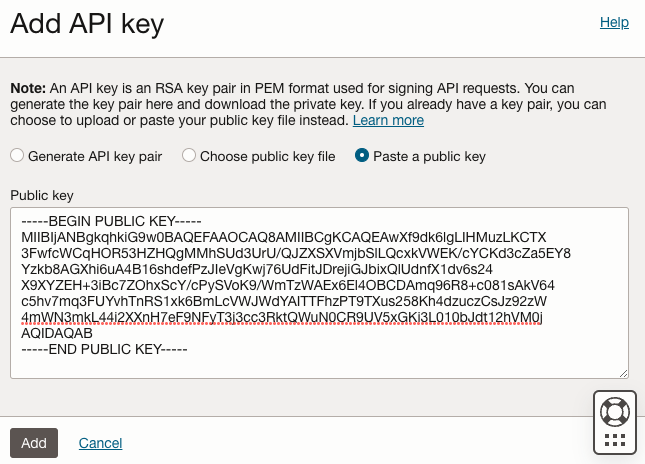
Add API Key를 클릭합니다.
-
생성된 Public Key(~/.oci/oci_api_key_public.pem)의 내용을 복사하여 등록합니다.
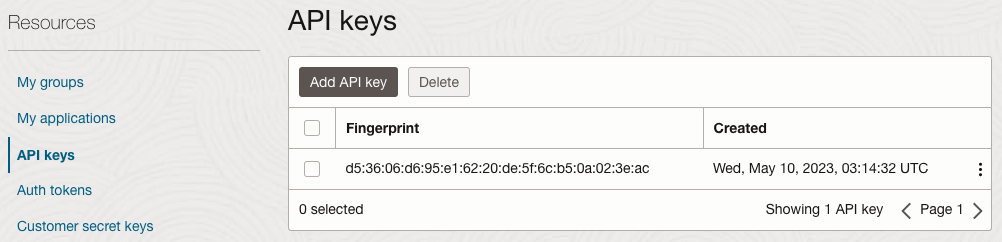
-
OCI CLI를 위한 API Public Key 등록 완료
-
다음 명령으로 테스트합니다.
oci os ns get-
실행결과
$ oci os ns get
{
  "data": "xxxxxxxxxxxx"
}
-
이 글은 개인으로서, 개인의 시간을 할애하여 작성된 글입니다. 글의 내용에 오류가 있을 수 있으며, 글 속의 의견은 개인적인 의견입니다.