1.2.1.2 OCI Load Balancer 상세 설정하기
OCI Load Balancer는 OCI에서 제공하고 있는 L7 로드 밸런서입니다. HTTP/HTTPS, HTTP/2, TCP의 프로토콜을 지원합니다. HTTP 기반 서비스 사용시 OCI Certificate을 통해 인증서 서비스를 연동하거나, OCI WAF, WAA 등과 연동을 할 수 있습니다.
기본 생성 Load Balancer
추가 설정없이 Service Type만 Load Balancer로 지정하는 경우, 이전에 주로 사용하던 Fixed Shape 형태의 로드 밸런서로 100Mbps 사이즈로 생성되며, 기본적으로 Public Subnet을 전제로 만들어 지게 됩니다.
-
기본 Load Balancer 생성 명령
kubectl expose deployment nginx-docker-hub --port 80 --type LoadBalancer --name nginx-docker-hub-svc -
기본 Load Balancer 생성 YAML
# nginx-docker-hub-svc.yaml --- apiVersion: v1 kind: Service metadata: name: nginx-docker-hub-svc spec: ports: - port: 80 targetPort: 80 selector: app: nginx-docker-hub type: LoadBalancer -
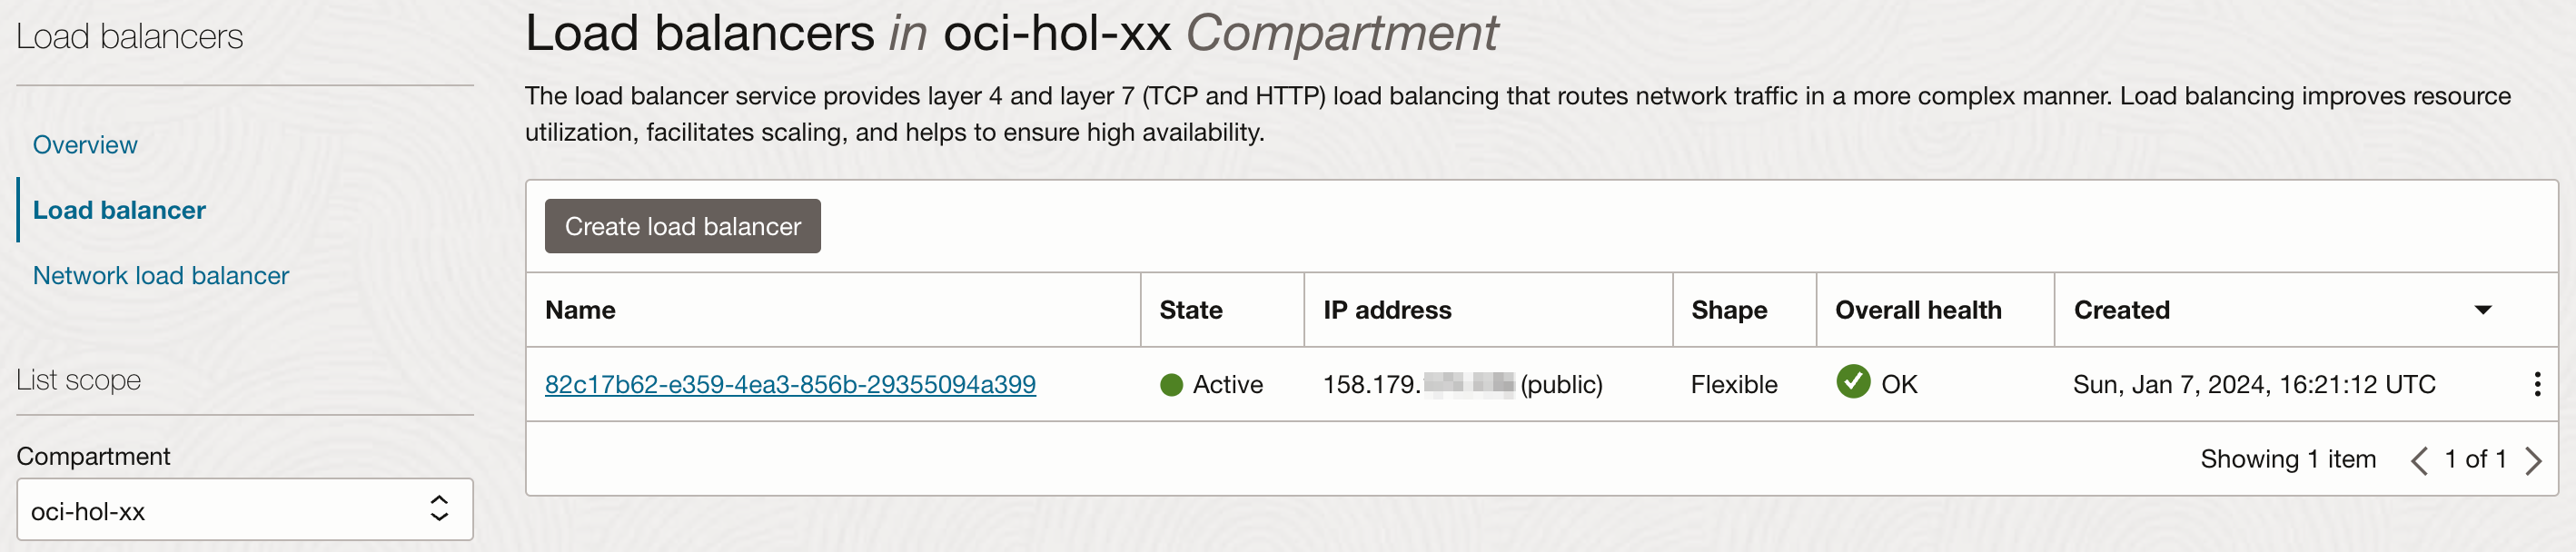
생성된 OCI Load Balancer

OCI Load Balancer 상세 설정하기
OCI Load Balancer의 설정가능한 annotations 전체 항목 에서 보듯이 annotation을 통해 추가적인 설정 기능을 제공합니다.
-
OCI Load Balancer를 사용하는 경우, 전체 annotations 중에서 아래 조합으로 기본적인 설정을 할 수 있겠습니다.
# nginx-docker-hub-svc-v2.yaml --- apiVersion: v1 kind: Service metadata: name: nginx-docker-hub-svc annotations: oci.oraclecloud.com/load-balancer-type: "lb" service.beta.kubernetes.io/oci-load-balancer-shape: "flexible" service.beta.kubernetes.io/oci-load-balancer-shape-flex-min: "10" service.beta.kubernetes.io/oci-load-balancer-shape-flex-max: "10" service.beta.kubernetes.io/oci-load-balancer-backend-protocol: "HTTP" spec: ports: - port: 80 targetPort: 80 selector: app: nginx-docker-hub type: LoadBalancer loadBalancerIP: 158.179.xxx.xxx-
annotation 설정값 설명
항목 값 설명 oci.oraclecloud.com/load-balancer-type"lb"Default: "lb"
- OCI Load Balancer 사용,
* L7지원
"nlb"- OCI Network Load Balancer 사용시
* L4 지원service.beta.kubernetes.io/oci-load-balancer-shape"flexible"Default: "100Mbps"
flexible shape 선택service.beta.kubernetes.io/oci-load-balancer-shape-flex-min"10"flexible 유형인 경우 최소 용량 지정 service.beta.kubernetes.io/oci-load-balancer-shape-flex-max"10"flexible 유형인 경우 최대 용량 지정 service.beta.kubernetes.io/oci-load-balancer-backend-protocol"HTTP"Default: "TCP"
Load Balancer의 Listener의 프로토콜을 지정
WAF, WAA 지원을 위해 HTTP으로 지정 -
spec.loadBalancerIP: Reserved Public IP를 사전에 만들어 가지고 있는 경우, 해당 IP를 직접 입력하여, 생성되는 Load Balancer에 원하는 IP를 부여합니다.
-
-
생성결과
-
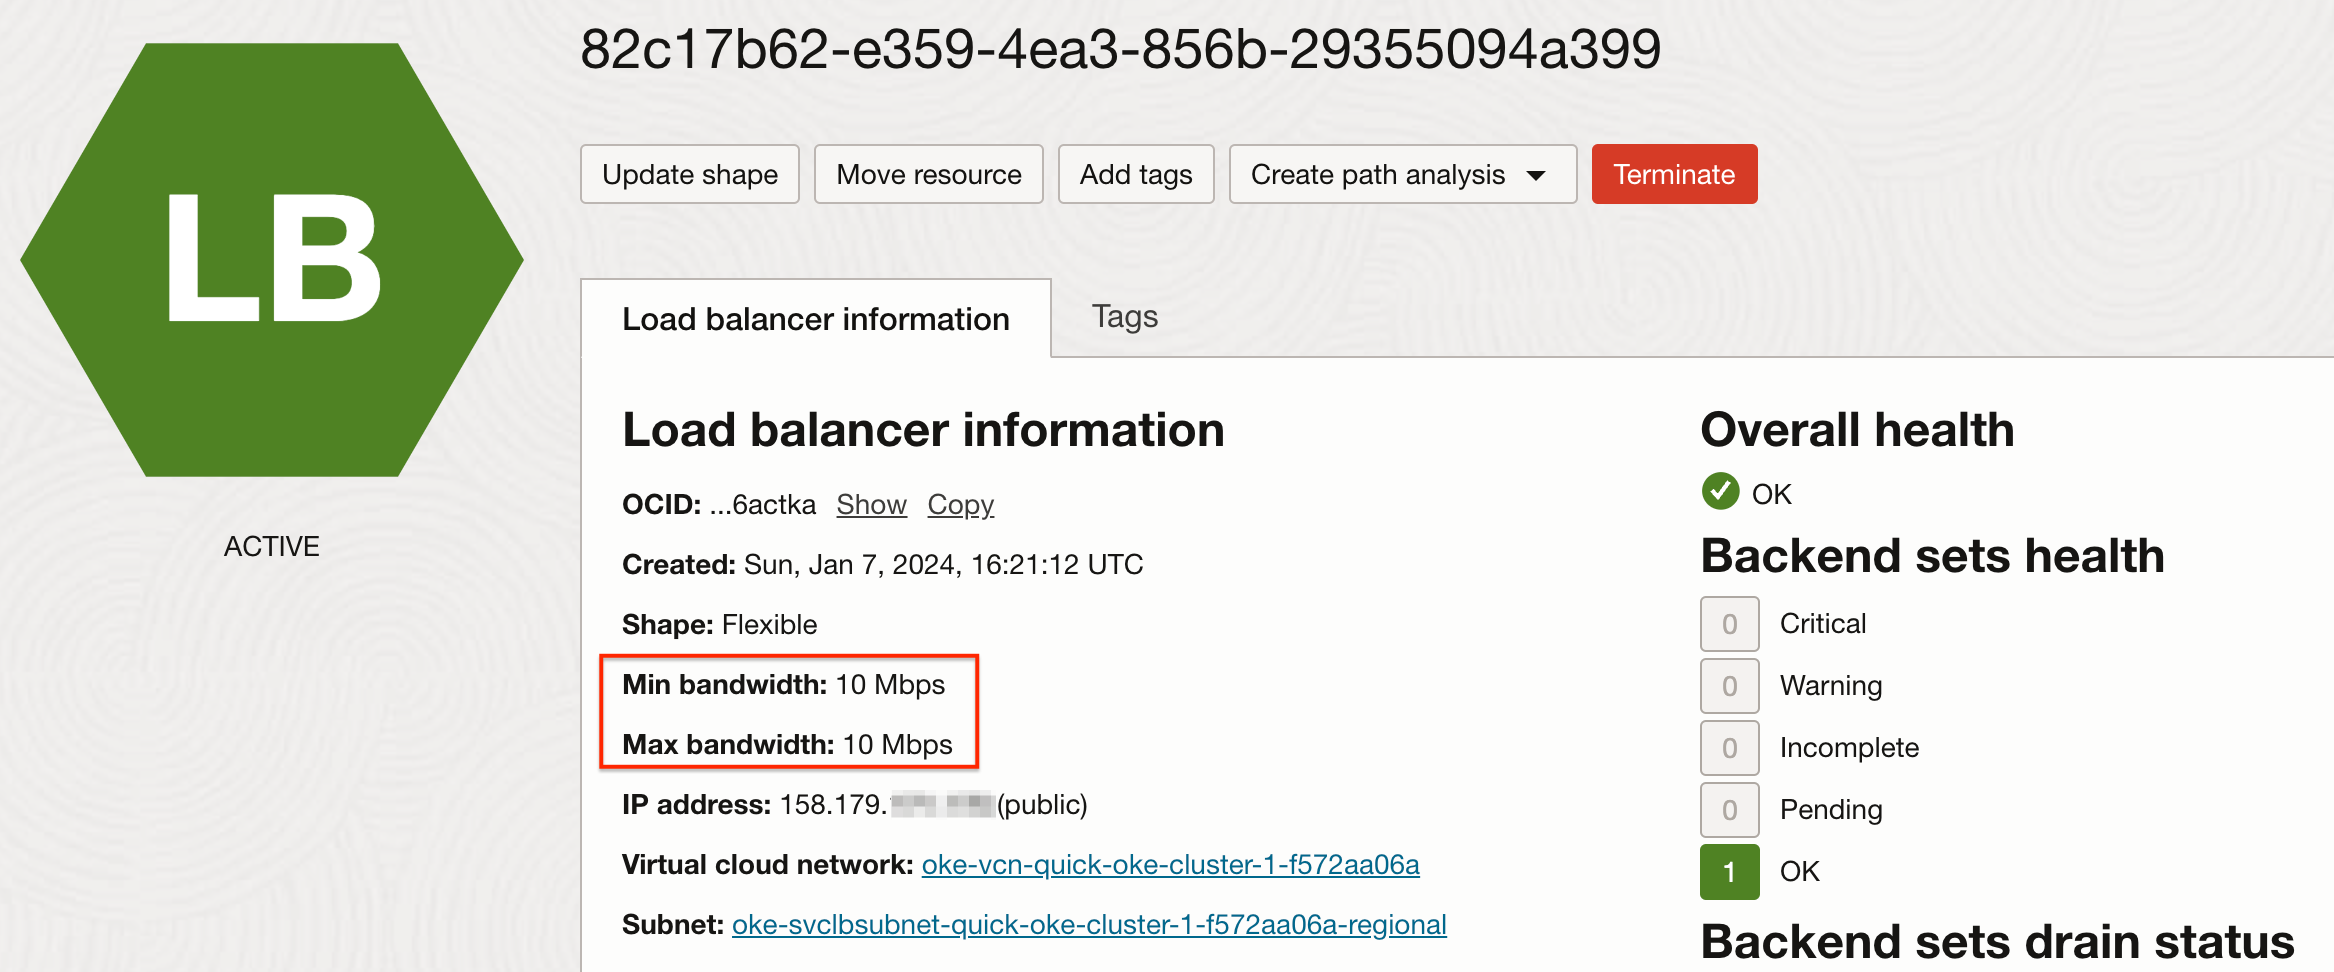
Flexible Shape, Reserved Public IP
-
Bandwidth
-
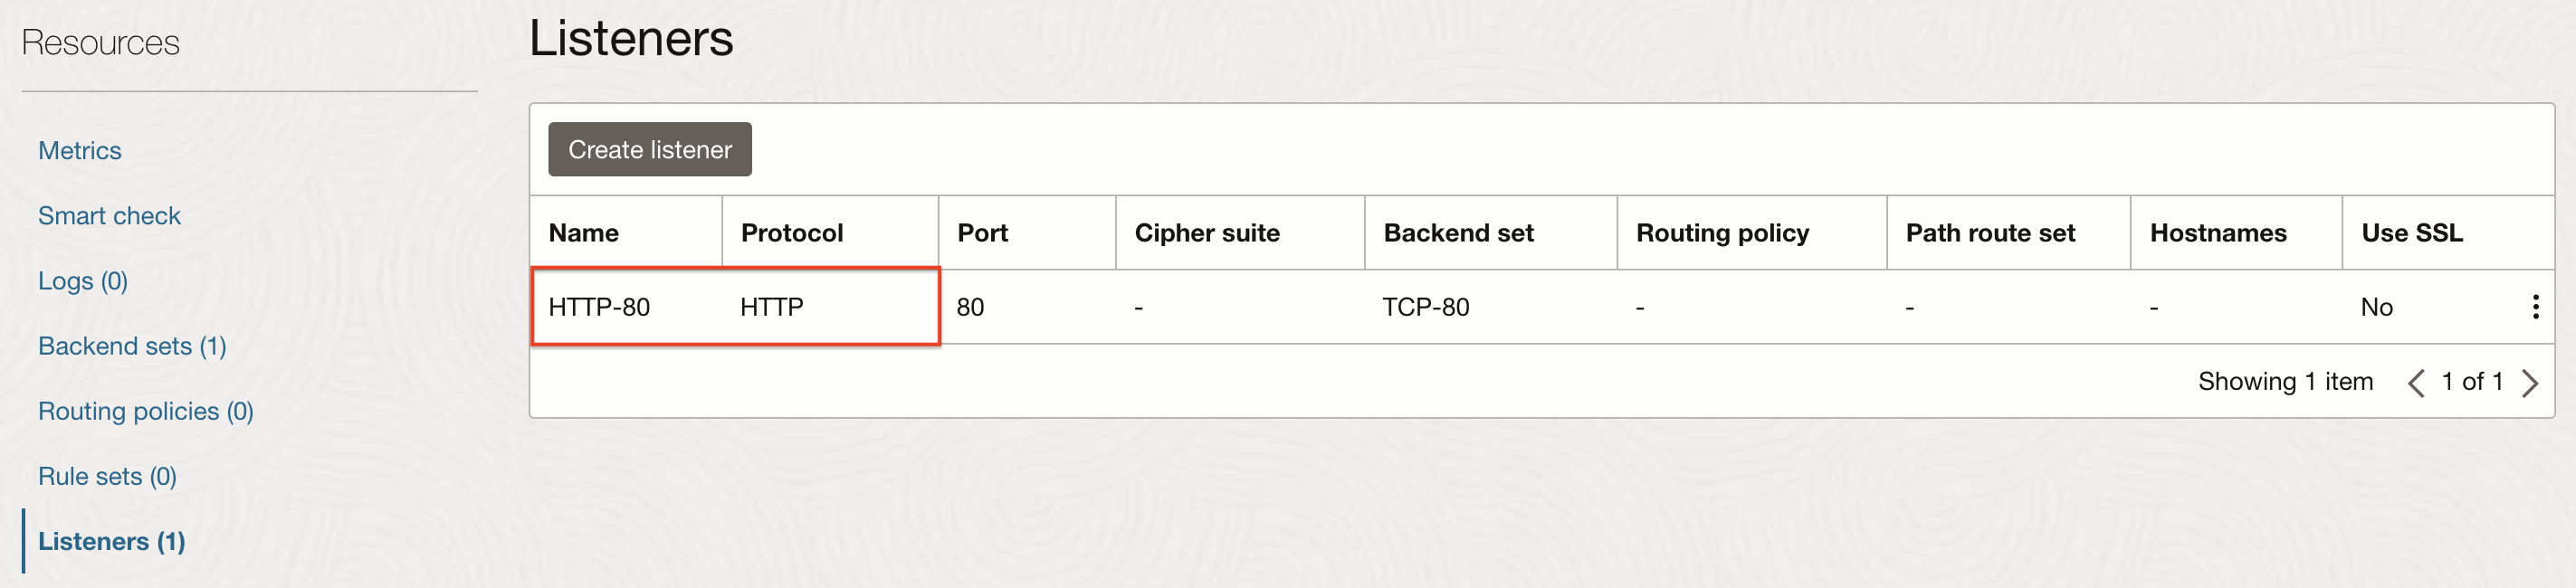
Protocol
-
추가사항: Internal Load Balancer
Annotation to assign a reserved private IPv4 address to a load balancer or network load balancer with OKE 기능이 출시되면서, Reserved Private IP를 지정하는 기능을 제공합니다. 기존 Internal Load Balancer를 사용하는 것에 추가하여, 해당 기능도 함께 알아봅니다.
-
Private Load Balancer를 사용하는 경우, 아래 옵션을 추가로 지정합니다.
metadata: annotations: service.beta.kubernetes.io/oci-load-balancer-internal: "true" ... -
Reserved Private IP를 사용하는 경우, Load Balancer가 위치하는 서브넷에서 먼저 reserved IPv4 address를 먼저 생성해야 합니다.
-
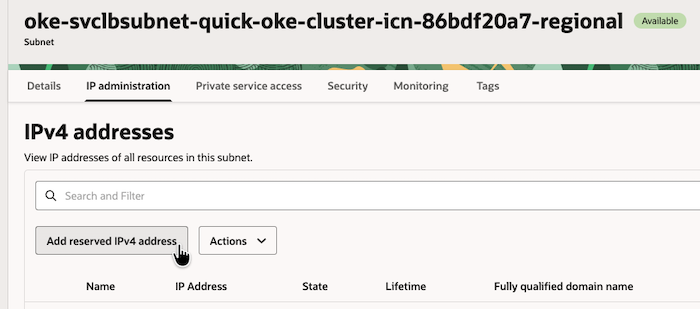
OCI Console에서 해당 서브넷으로 이동합니다.
-
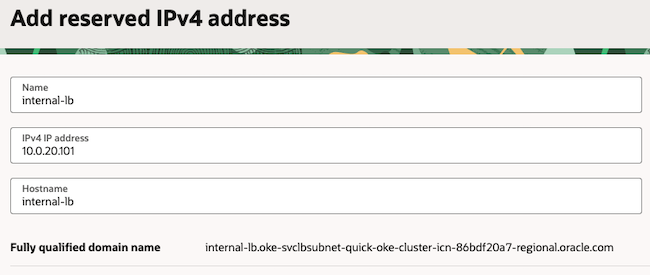
IP administration 탭에서 Add reserved IPv4 address를 클릭합니다.
-
서브넷 CIDR 내에서 예약할 IP를 입력하고 Private DNS에 등록할 Hostname도 입력합니다.
-
예약 완료

-
-
Load Balancer 타입 서비스를 배포할 때
oci.oraclecloud.com/reserved-private-ips을 사용하여 reserved IPv4 address을 입력합니다.... metadata: name: ... annotations: service.beta.kubernetes.io/oci-load-balancer-internal: "true" oci.oraclecloud.com/reserved-private-ips: "10.0.20.101" oci.oraclecloud.com/load-balancer-type: "lb" service.beta.kubernetes.io/oci-load-balancer-shape: "flexible" service.beta.kubernetes.io/oci-load-balancer-shape-flex-min: "10" service.beta.kubernetes.io/oci-load-balancer-shape-flex-max: "10" service.beta.kubernetes.io/oci-load-balancer-backend-protocol: "HTTP" ... -
작성한 yaml 파일을 배포하면, 아래와 같이 Service 자원이 만들어 집니다. EXTERNAL-IP에 예약한 IP가 할당된 것을 볼 수 있습니다.
$ kubectl get svc
NAME                   TYPE           CLUSTER-IP      EXTERNAL-IP   PORT(S)             AGE
kubernetes             ClusterIP      10.96.0.1       <none>        443/TCP,12250/TCP   4h29m
nginx-docker-hub-svc   LoadBalancer   10.96.157.194   10.0.20.101   80:31261/TCP        53s
이 글은 개인으로서, 개인의 시간을 할애하여 작성된 글입니다. 글의 내용에 오류가 있을 수 있으며, 글 속의 의견은 개인적인 의견입니다.