Warning
This content has been generated by machine translation. The translations are automated and have not undergone human review or validation.
1.4 Deploying an App and Using a Load Balancer
Testing Docker Hub images
Try deploying the image to the OKE cluster by pulling the image to the most common form, Public Container Registry.
kubectl create deployment nginx-docker-hub --image=nginx:latestIf you check the distribution result, you can see that it has been deployed normally.
oke_admin@cloudshell:~ (ap-chuncheon-1)$ kubectl create deployment nginx-docker-hub --image=nginx:latest
deployment.apps/nginx-docker-hub created
oke_admin@cloudshell:~ (ap-chuncheon-1)$ kubectl get all
NAME                                    READY   STATUS    RESTARTS   AGE
pod/nginx-docker-hub-78b9999646-xgtjp   1/1     Running   0          17s

NAME                 TYPE        CLUSTER-IP   EXTERNAL-IP   PORT(S)   AGE
service/kubernetes   ClusterIP   10.96.0.1    <none>        443/TCP   130m

NAME                               READY   UP-TO-DATE   AVAILABLE   AGE
deployment.apps/nginx-docker-hub   1/1     1            1           19s

NAME                                          DESIRED   CURRENT   READY   AGE
replicaset.apps/nginx-docker-hub-78b9999646   1         1         1       20s
Test Load Balancer
Using Load Balancer service
Create a service with LoadBalancer Type for the client service.
If you check the service creation result, you can see that it was created as a LoadBalancer type and assigned a public IP as shown below.
oke_admin@cloudshell:~ (ap-chuncheon-1)$ kubectl expose deployment nginx-docker-hub --port 80 --type LoadBalancer --name nginx-docker-hub-svc
service/nginx-docker-hub-svc exposed
oke_admin@cloudshell:~ (ap-chuncheon-1)$ kubectl get svc
NAME                   TYPE           CLUSTER-IP     EXTERNAL-IP     PORT(S)        AGE
kubernetes             ClusterIP      10.96.0.1      <none>          443/TCP        135m
nginx-docker-hub-svc   LoadBalancer   10.96.44.184   152.67.200.29   80:30610/TCP   49s
If you connect to the service address, Public IP, you can see the connection.
oke_admin@cloudshell:~ (ap-chuncheon-1)$ curl http://152.67.200.29
<!DOCTYPE html>
<html>
<head>
<title>Welcome to nginx!</title>
<style>
html { color-scheme: light dark; }
body { width: 35em; margin: 0 auto;
font-family: Tahoma, Verdana, Arial, sans-serif; }
</style>
</head>
<body>
<h1>Welcome to nginx!</h1>
<p>If you see this page, the nginx web server is successfully installed and
working. Further configuration is required.</p>

<p>For online documentation and support please refer to
<a href="http://nginx.org/">nginx.org</a>.<br/>
Commercial support is available at
<a href="http://nginx.com/">nginx.com</a>.</p>

<p><em>Thank you for using nginx.</em></p>
</body>
</html>
Check Load Balancer in OCI Service Console
In the console, go to Networking > Load Balancer. Go to the Compartment where the OKE cluster is located.
As shown in the figure below, you can see that the Load Balancer was created with same public IP as the service created on kubernetes.

Click the Load Balancer name to go to the detail screen.
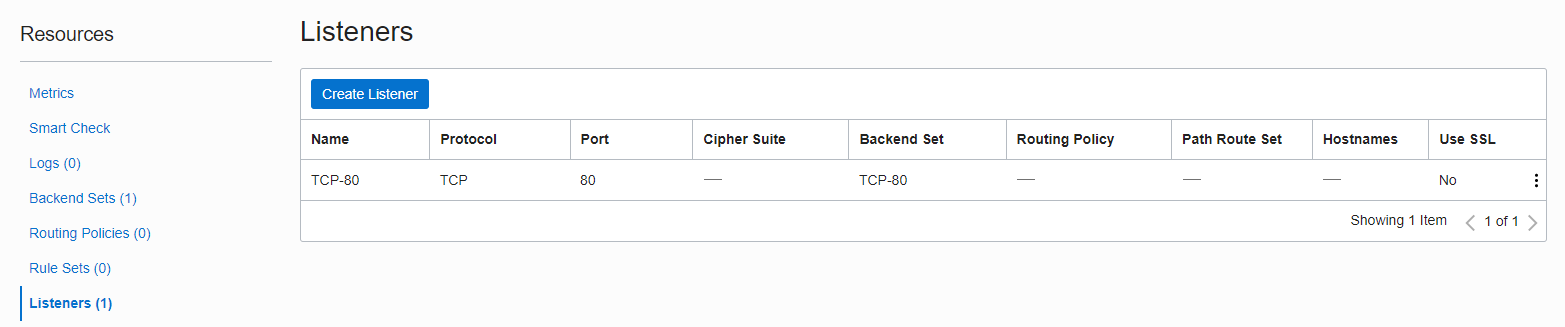
On the detail screen, go to Resources > Listeners at the bottom left.
You can see that kubernetes is listening on the **80 port specified when the Load Balancer is created.
Go to Resources > Backend Set. Click the created Backend Set to move to the detail screen.
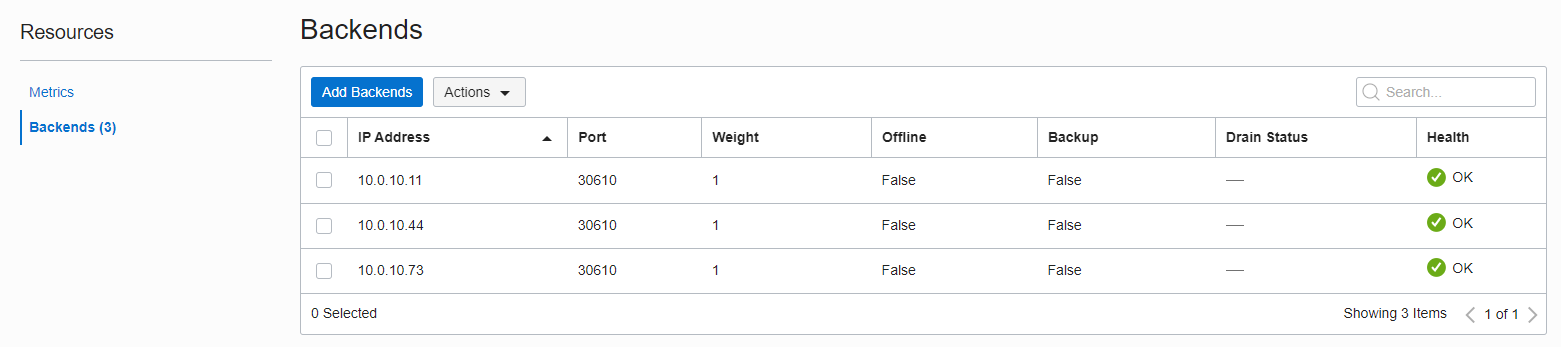
Go to the lower left corner Resources > Backends.
You can see the load balancing to port 30610 on the three backend nodes.
Go back to the terminal and look up the service and node information.
kubectl get svc
kubectl get nodes -o wide
Search results
If you look it up, you can see that the OCI Load Balancer has 3 Worker Nodes, and the load is distributed to 30610, the Node Port of each node. When you create a Load Balancer Type service in kubernetes like this, it works with OCI Load Balancer to automatically create resources.
oke_admin@cloudshell:~ (ap-chuncheon-1)$ kubectl get svc
NAME                   TYPE           CLUSTER-IP     EXTERNAL-IP     PORT(S)        AGE
kubernetes             ClusterIP      10.96.0.1      <none>          443/TCP        160m
nginx-docker-hub-svc   LoadBalancer   10.96.44.184   152.67.200.29   80:30610/TCP   25m
oke_admin@cloudshell:~ (ap-chuncheon-1)$ kubectl get nodes -o wide
NAME         STATUS   ROLES   AGE    VERSION    INTERNAL-IP   EXTERNAL-IP   OS-IMAGE                  KERNEL-VERSION                    CONTAINER-RUNTIME
10.0.10.11   Ready    node    155m   v1.20.11   10.0.10.11    <none>        Oracle Linux Server 7.9   5.4.17-2102.206.1.el7uek.x86_64   cri-o://1.20.2
10.0.10.44   Ready    node    155m   v1.20.11   10.0.10.44    <none>        Oracle Linux Server 7.9   5.4.17-2102.206.1.el7uek.x86_64   cri-o://1.20.2
10.0.10.73   Ready    node    155m   v1.20.11   10.0.10.73    <none>        Oracle Linux Server 7.9   5.4.17-2102.206.1.el7uek.x86_64   cri-o://1.20.2
Check Security List in OCI Service Console
In the console, go to Networking > Virtual Cloud Networks. Go to the Compartment where the OKE cluster is located.
Navigate to the VCN used by the OKE cluster.
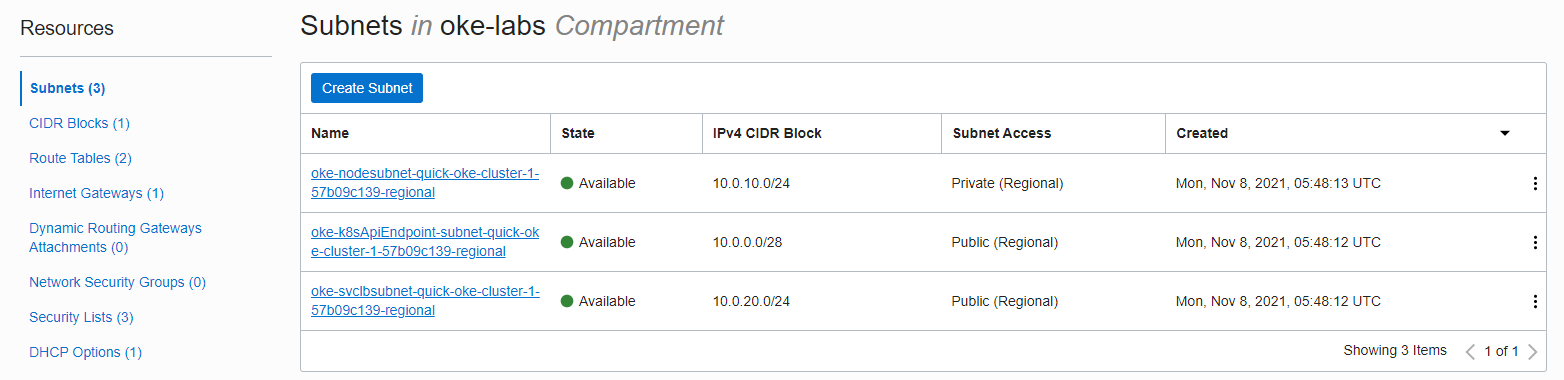
If you look at Subnet, as shown in the figure, there are 3 subnets.
- oke-k8sApiEndpoint-subnet~~: Subnet for Kubernetes API Endpoint
- oke-svclbsubnet-~~: Subnet used by Load Balancer
- oke-nodesubnet-~~: Subnet used by Worker Nodes
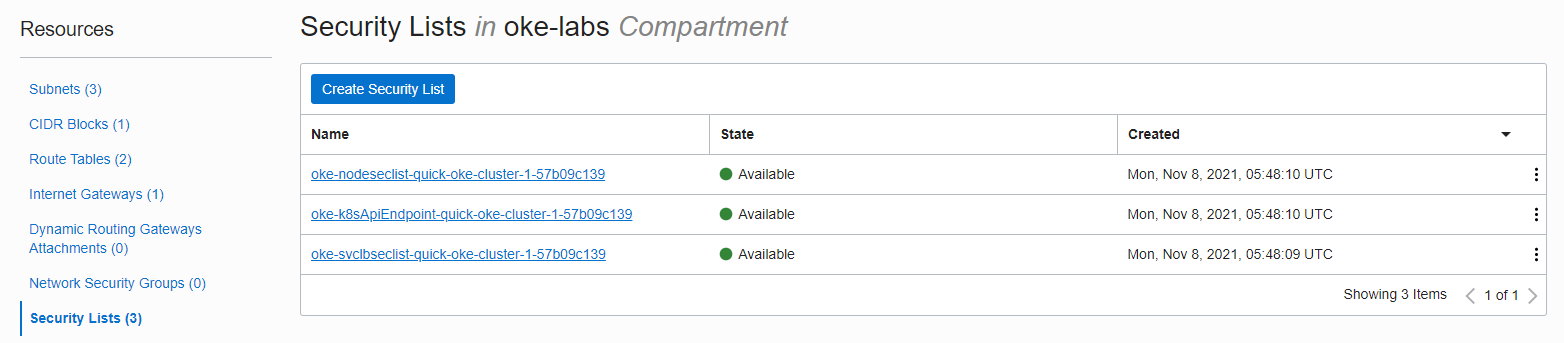
Go to Resources > Security Lists, there are 3 Security Lists used by the above 3 subnets.
Check Subnets for Load Balancer
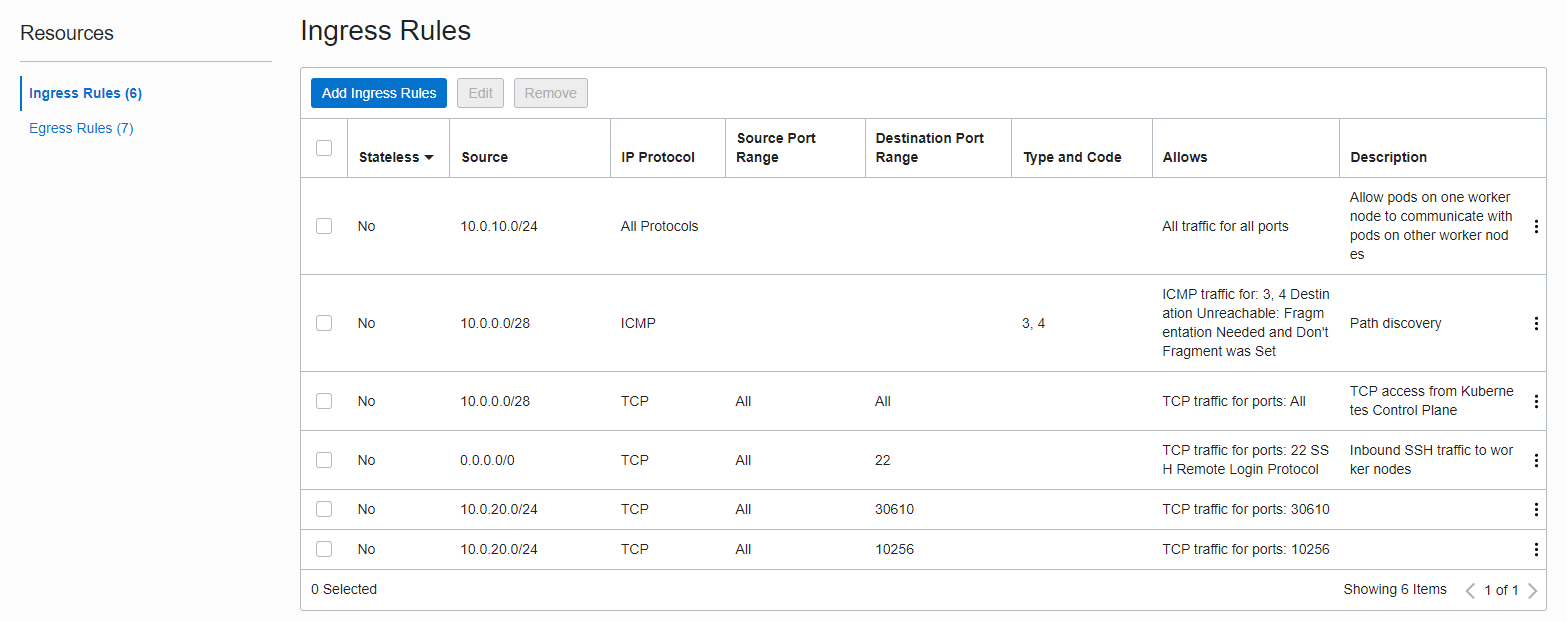
First, go to the detail screen of oke-svclbsubnet-~~. If you check the Ingress/Egress Rule, you can see that it is automatically added to receive port 80 from the outside and transmit to 30610, the Node Port of Worker Nodes.

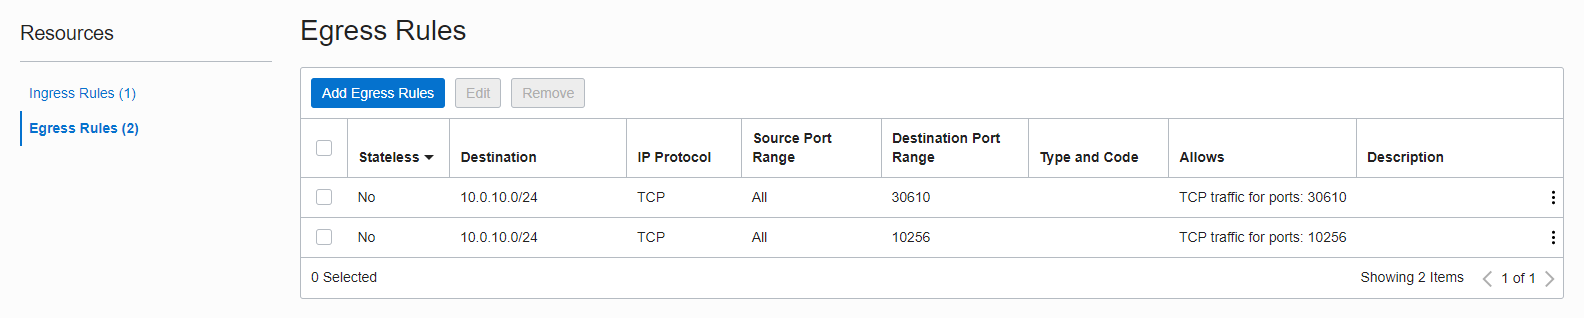
Go back to the VCN detail screen and check the subnets for Worker Nodes.
You can see that the OCI Load Balancer has automatically added a rule to receive a request to Node Port: 30610.
If you create a Load Balancer service type with the kubernetes command in the OKE cluster as above, you can see that the OCI Load Balancer is created and registered in the related Security List accordingly.
As an individual, this article was written with my personal time. There may be errors in the content of the article, and the opinions in the article are personal opinions.