Warning
This content has been generated by machine translation. The translations are automated and have not undergone human review or validation.
2.1 Scanning container images
OCIR provides vulnerability analysis capabilities for container images based on a known Common Vulnerabilities and Exposures (CVE) database. Next, check the image scan function for vulnerability analysis.
official documentation
- [Scanning Images for Vulnerabilities] (https://docs.oracle.com/en-us/iaas/Content/Registry/Tasks/registryscanningimagesforvulnerabilities.htm)
Set related policy
The scan service authorizes the OCIR repository. For the policy to be applied, refer to the above official document. Tenancy can be specified for all or a compartment.
full tenancy
- name: ex) ocir-scanning-images-root-policy
allow service vulnerability-scanning-service to read repos in tenancy
allow service vulnerability-scanning-service to read compartments in tenancy
specific compartment
allow service vulnerability-scanning-service to read repos in compartment <compartment-name>
allow service vulnerability-scanning-service to read compartments in compartment <compartment-name>
Example of setting
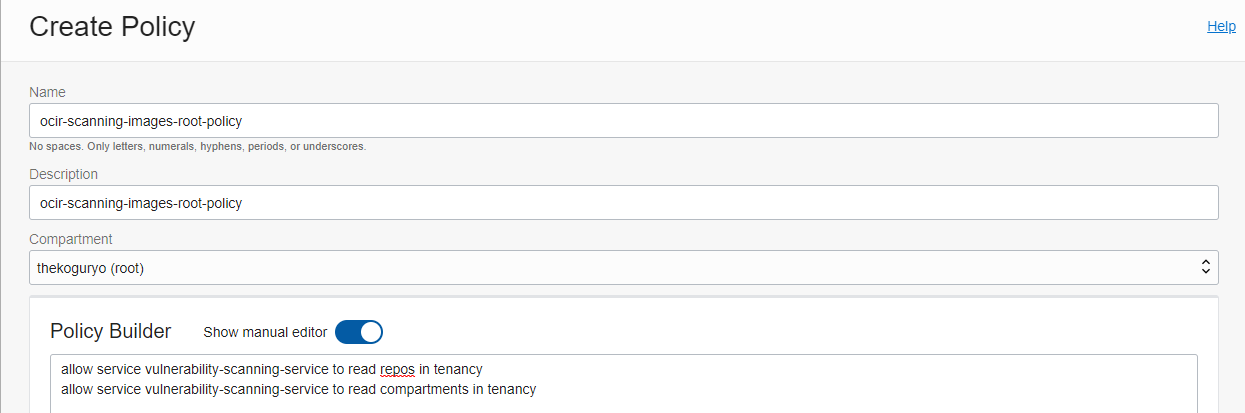
Image Scanner Settings
Image Scanner can add or delete functions in units of repository. Deploy the image first for testing.
Refer to Deploying an app using an OCIR image to deploy the image to OCIR.
Deploy the image to OCIR
docker pull nginx:latest
docker tag nginx:latest ap-seoul-1.ocir.io/cnrlxx3w0wgq/nginx:latest
docker push ap-seoul-1.ocir.io/cnrlxx3w0wgq/nginx:latest
Log in to the OCI console.
From the top left hamburger menu, go to Developer Services > Containers & Artifacts : Container Registry.
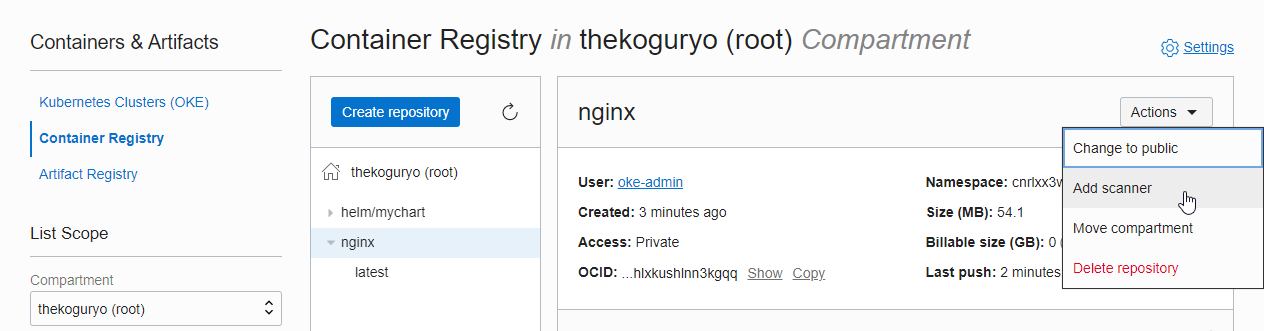
In List Scope, select the target Compartment (eg root).
Select the Repository (eg nginx) you want to set up your scanner on and select Add scanner from the right Actions menu.
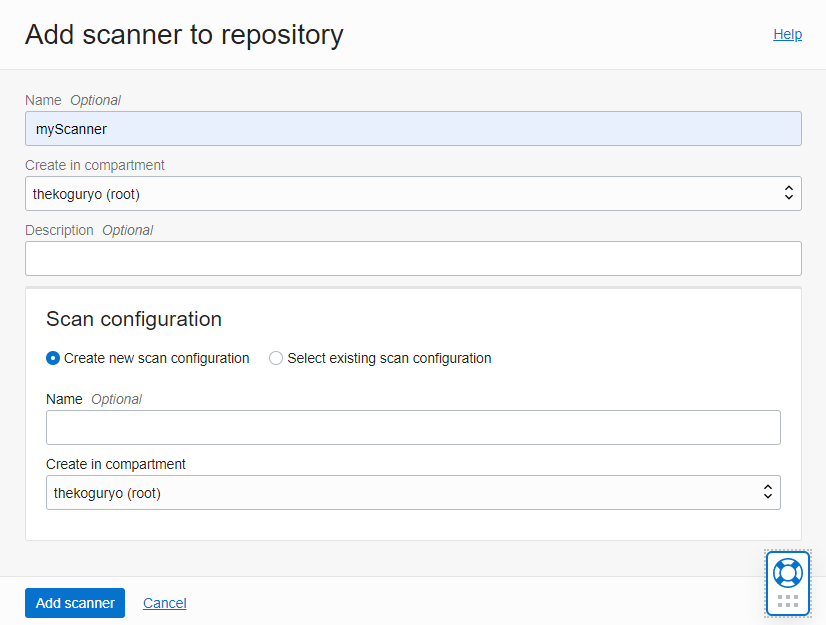
Check the compartment location of the scanner to be created, and add the scanner by selecting Create new scan configuration as this is the first time you use the scanner. Currently, there does not seem to be a function that can be additionally set for each scanner, so you can create it once and use the created one from now on.
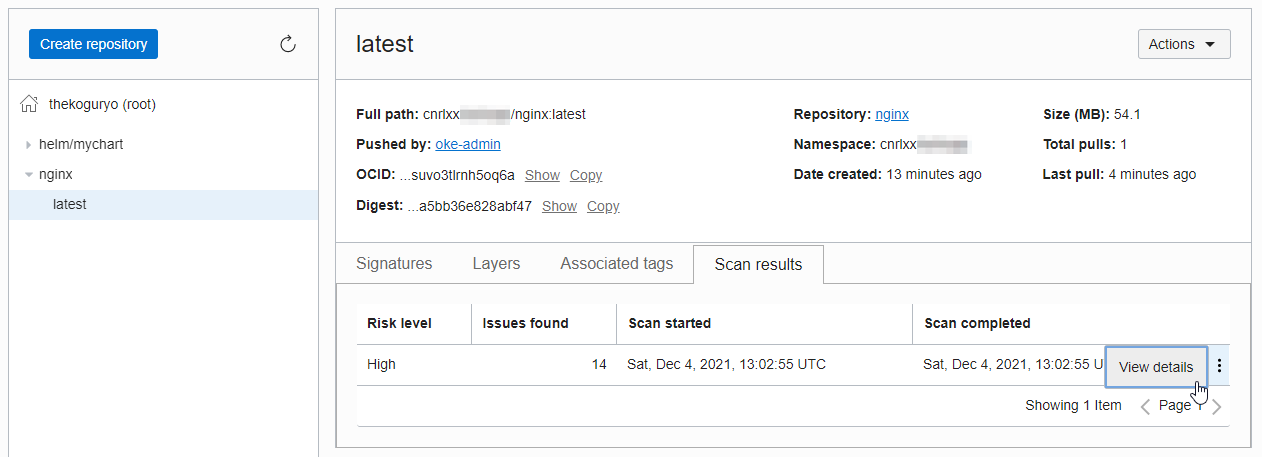
Check Scanner Results
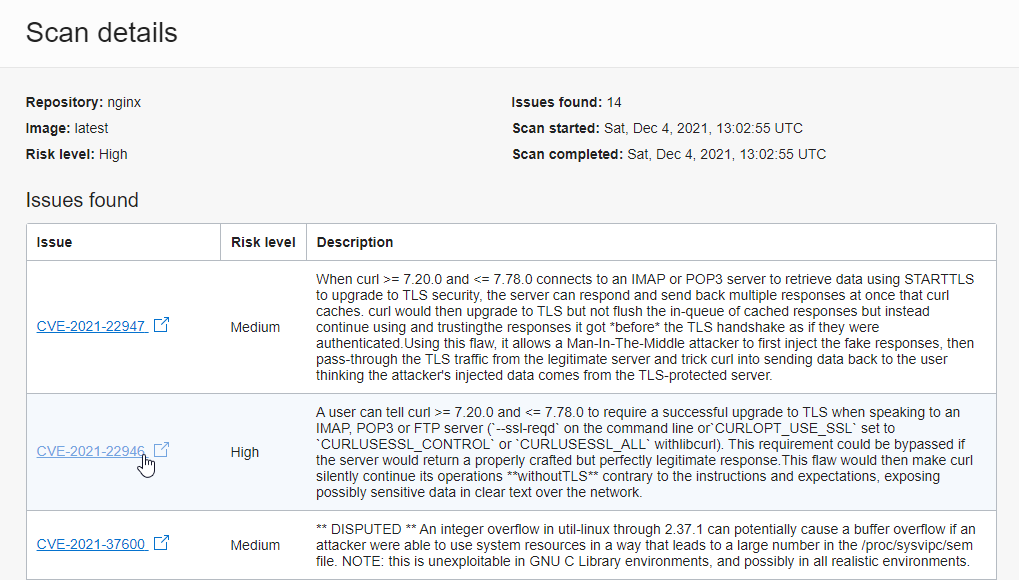
For the nginx repository where the scanner is added, you can see the container image details by tag. You can check the scan results in the Scan results tab, and you can check the detailed information in the View details.
Vulnerability Check
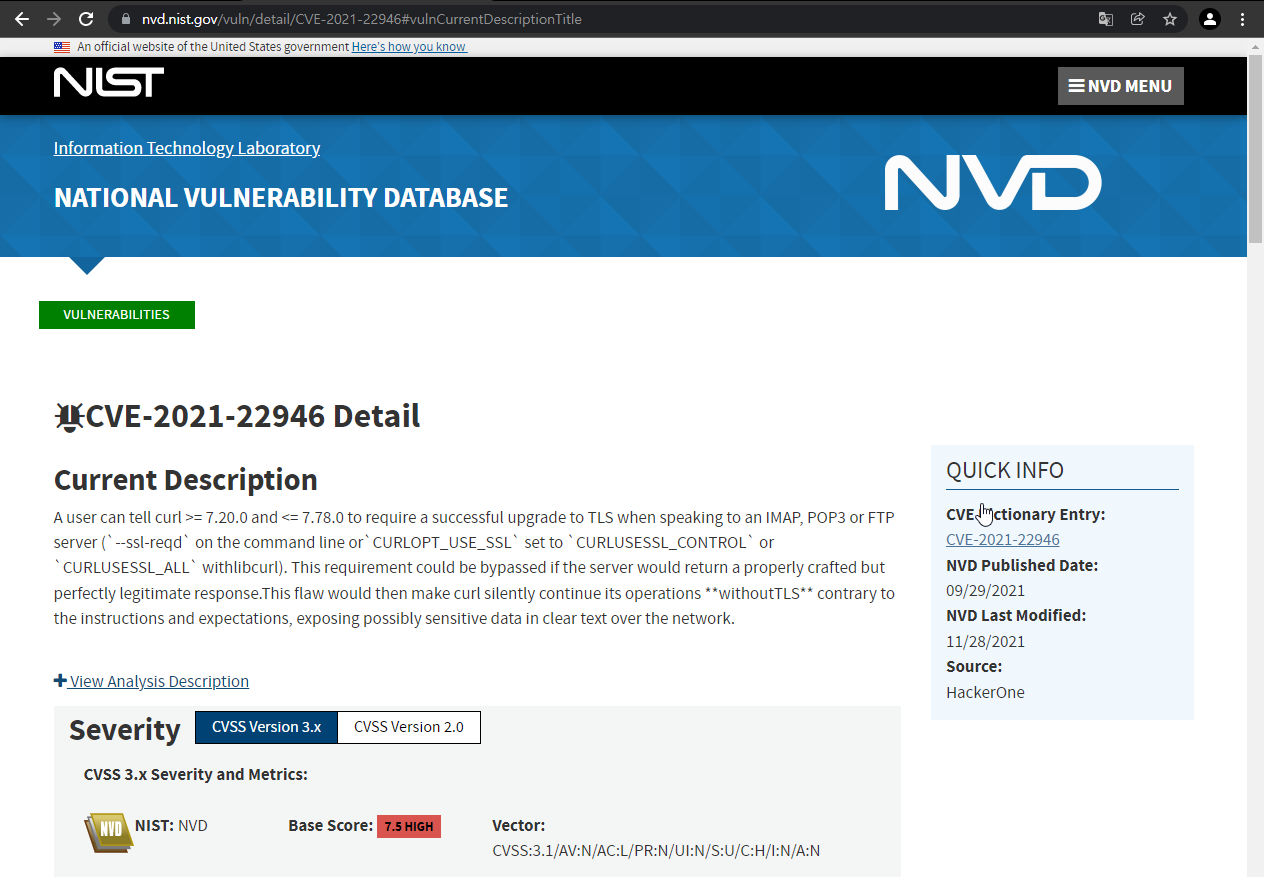
Verification of Image Scanning Results You can check vulnerabilities based on known CVE information. If you click a vulnerability, you can go to the actual CVE database and check detailed information.
As an individual, this article was written with my personal time. There may be errors in the content of the article, and the opinions in the article are personal opinions.