Warning
This content has been generated by machine translation. The translations are automated and have not undergone human review or validation.
13.1 Preparation for Autoscaling
Create an instance for Autoscaling
Autoscaling requires a reference image. Let’s create an image with Apache installed on Oracle Linux used in the Load Balancer chapter so that one additional instance of Apache can be started for server extension through Autoscaling. Also consider using cloud-init, considering how to get the latest sources for additional instances to run. At this time, to make it easier to confirm that it is an additional instance, the private IP of the created host is visible in index.html.
-
Go to the Compute Instance creation screen.
-
Click Show advanced options below
-
You can use cloud-init to set a script to start on instance creation. Here, we use a bash script to install Apache and create index.html.
#!/bin/bash
sudo yum -y install httpd
sudo firewall-offline-cmd --add-port=80/tcp
sudo systemctl enable httpd
MY_IP=$(hostname -I)
sudo bash -c "echo 'Hello Apache on '$MY_IP >> /var/www/html/index.html"
sudo reboot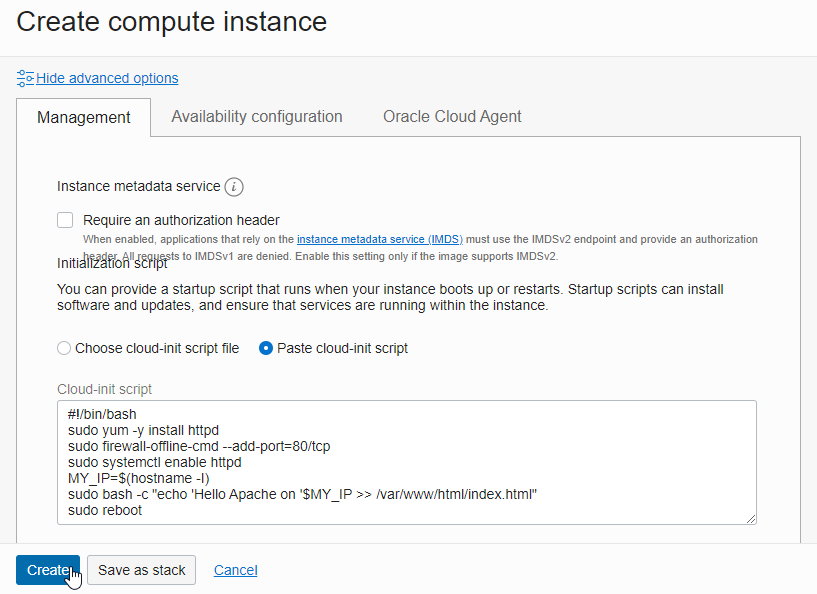
-
Click Create below to create the instance.
-
cloud-init log You can check the execution log of cloud-init in the
/var/log/messages file.-
Example of cloud-init log
...
Jan 17 07:03:31 autoscalingwebserver-694639 cloud-init: Installed:
Jan 17 07:03:31 autoscalingwebserver-694639 cloud-init: httpd.x86_64 0:2.4.6-97.0.5.el7_9.2
Jan 17 07:03:31 autoscalingwebserver-694639 cloud-init: Dependency Installed:
Jan 17 07:03:31 autoscalingwebserver-694639 cloud-init: apr.x86_64 0:1.4.8-7.el7 apr-util.x86_64 0:1.5.2-6.0.1.el7
Jan 17 07:03:31 autoscalingwebserver-694639 cloud-init: httpd-tools.x86_64 0:2.4.6-97.0.5.el7_9.2 mailcap.noarch 0:2.1.41-2.el7
Jan 17 07:03:31 autoscalingwebserver-694639 cloud-init: Complete!
Jan 17 07:03:32 autoscalingwebserver-694639 cloud-init: success
Jan 17 07:03:32 autoscalingwebserver-694639 cloud-init: Created symlink from /etc/systemd/system/multi-user.target.wants/httpd.service to /usr/lib/systemd/system/httpd.service.
...
-
Caution
Mar 5 05:50:46 instance-20190305-1447 cloud-init: ERROR:dbus.proxies:Introspect error on :1.3:/org/fedoraproject/FirewallD1: dbus.exceptions.DBusException: org.freedesktop.DBus.Error.NoReply : Did not receive a reply. Possible causes include: the remote application did not send a reply, the message bus security policy blocked the reply, the reply timeout expired, or the network connection was broken.
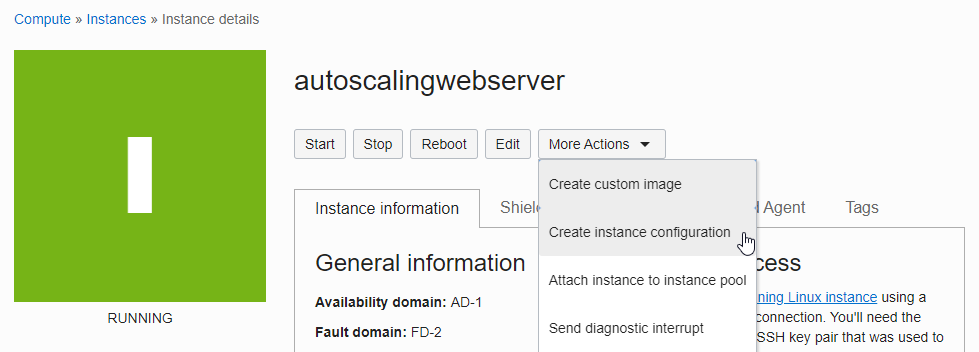
Create Instance Configuration
Instance Configuration is required to create the configuration information of the instance created during autoscaling. make them in the following order
-
Go to the detail screen of the instance you want to use.
-
Click Create instance configuration in the additional action menu
-
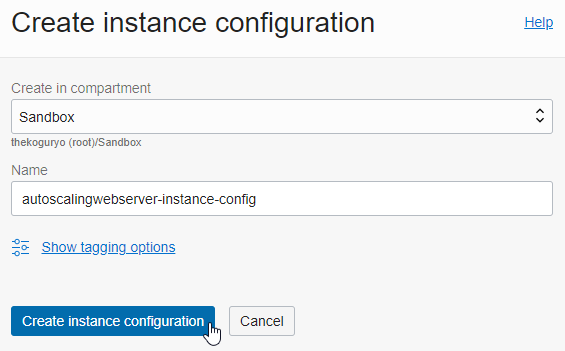
Enter the Instance Configuration name and click Create
-
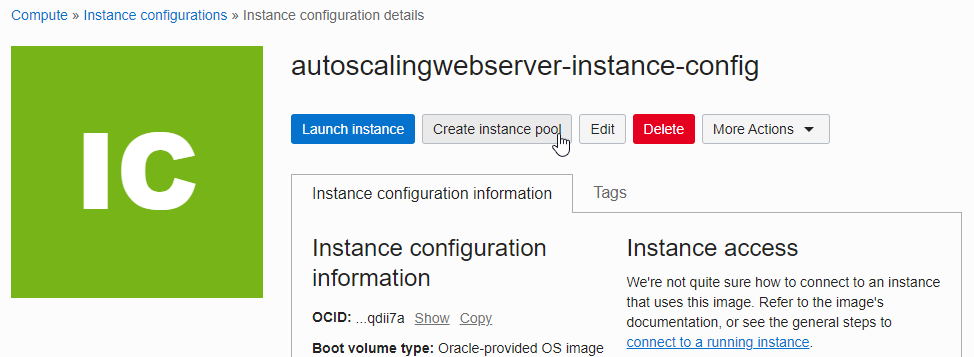
Complete creation
Create Instance Pool
Instance Pool is a collection of instances based on the same configuration created through Instance Configuration.
-
To use a Load Balancer in the Instance Pool, you must create it in advance. Use the Load Balancer created in the previous chapter, or create one in advance if you don’t have one.
-
Click Create instance pool in the Instance Configuration you created earlier.
-
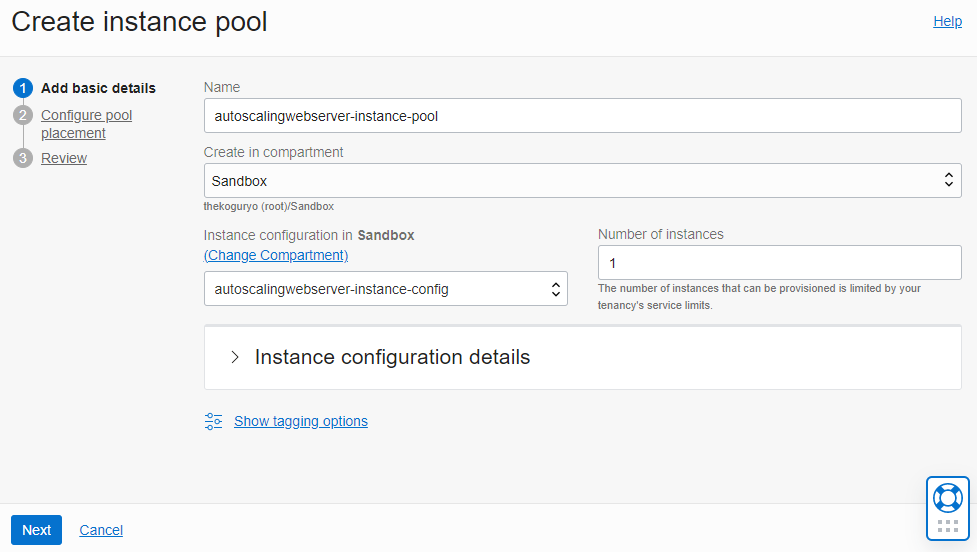
Basic Information on Instance Pool Creation
-
Name: Enter the desired name
-
Number of instances: the number of instances to start with pool creation, once set to 1
-
-
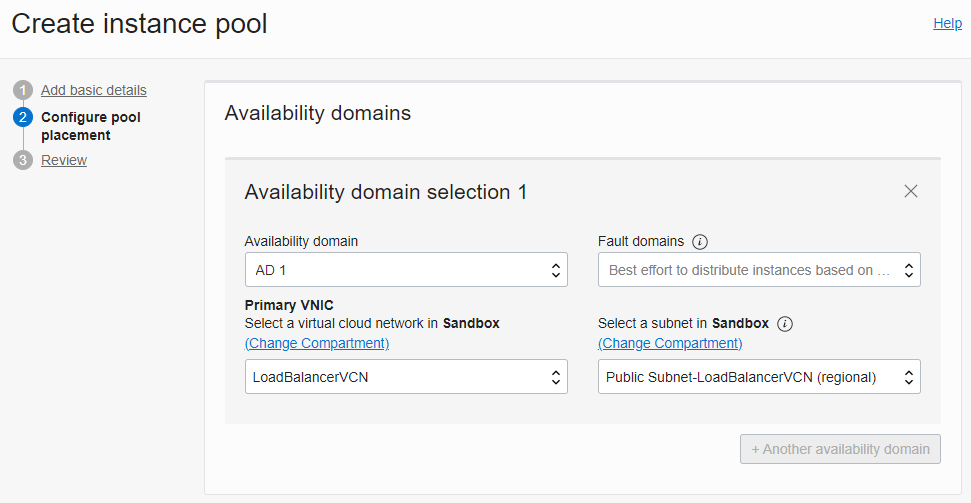
Location information
-
Select the domain, VCN, and Subnet where the VMs to be created will be located.
-
-
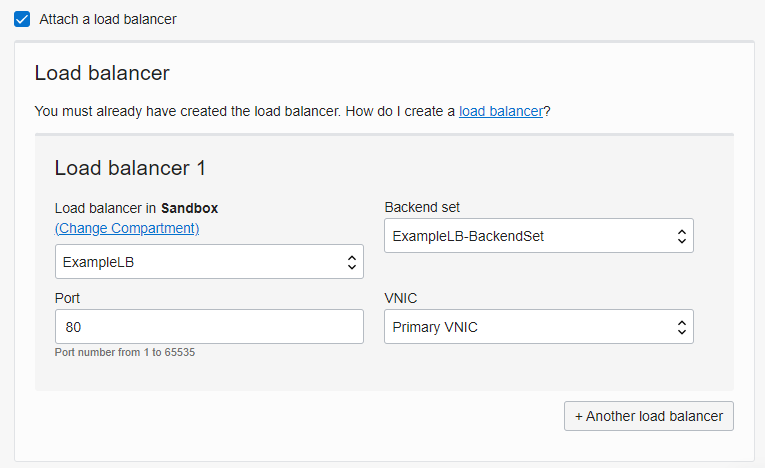
Load Balancer Settings
-
Check Attach a load balancer because Load Balancer is required for distribution between instances.
-
We use the one we created in the Load Balancer chapter. If not, create a new one.
-
Load balancer: Select the Load Balancer to use
-
Backend set: Select the Backend Set as the distribution target of the Load Balancer
-
Port: Enter the port to listen on
-
VNIC: Select as there is only Primary VNIC
-
-
After confirming the selected settings, click Create.
-
Instance Pool is created and 1 instance is created

-
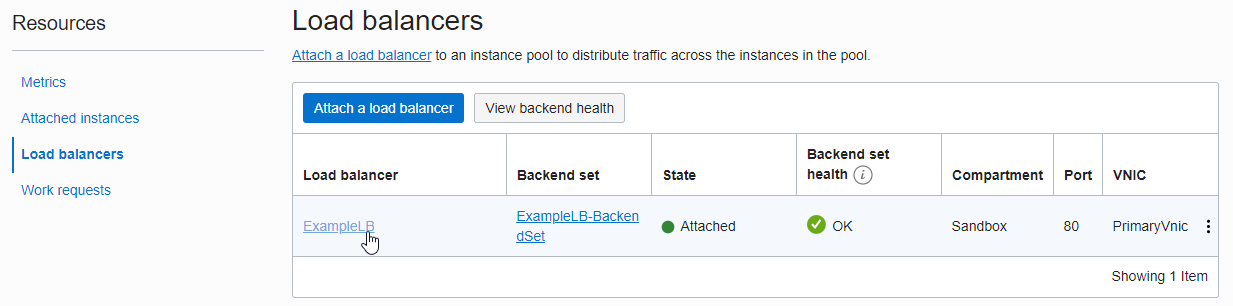
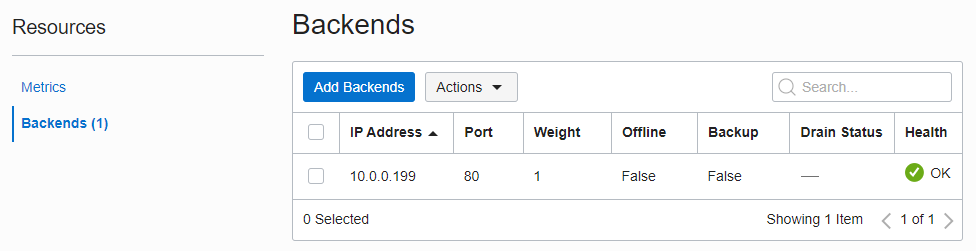
Go to Resources > Load balancer and click on the associated Load Balancer
-
In LB details, go to Backend Set and click Backend Set used by Instance Pool
-
You can see that it has been automatically added to the Backend Set. Also, you can see that the Health is OK and normal communication with the Apache server in the created VM.
-
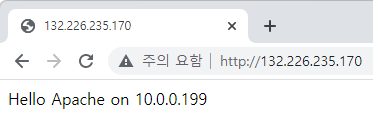
Connect to LB’s Public IP through a browser. You can see that it is configured normally.
As an individual, this article was written with my personal time. There may be errors in the content of the article, and the opinions in the article are personal opinions.