Warning
This content has been generated by machine translation. The translations are automated and have not undergone human review or validation.
10.5 Creating a Load Balancer
Create Load Balancer
-
Open the navigation menu in the OCI console. Go to Networking > Load Balancers.
-
Click Create Load Balancer.
-
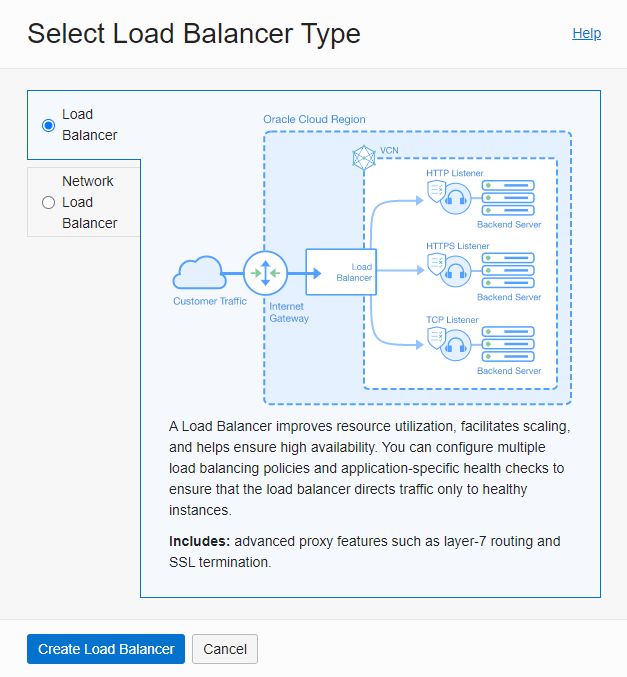
Select Load Balancer as the type.
- Load Balancer Type: Used when distributing to HTTP listeners as L7 load balancers.
- Network Load Balancer Type: L4 load balancer, used to distribute to general IP and Port.
-
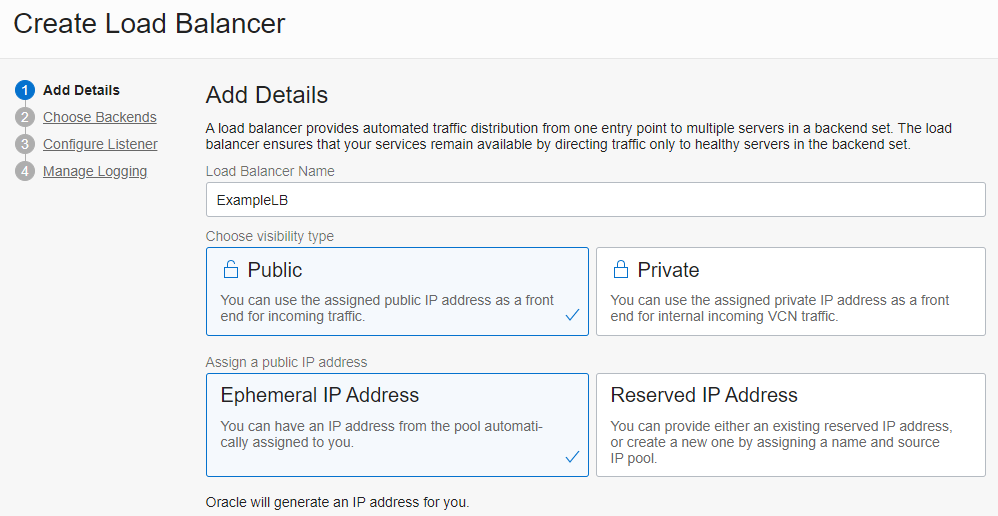
Enter basic creation information
-
Name: Enter Load Balancer name, Ex) ExampleLB
-
Choose visibility type: Select Public here
- Public: Select whether to grant public IP
- Private: It has only Private IP. In case of an internal load balancer, set whether it is a load balancer for selection.
-
Assign a public IP address: Specifies whether to use a fixed public IP that provides external services as a public IP. Since this is a test, choose Ephemeral IP Address
- Ephemeral IP Address: When using the public IP given when creating the Load Balancer
- Reserved IP Address: When using a public IP reserved by the user
-
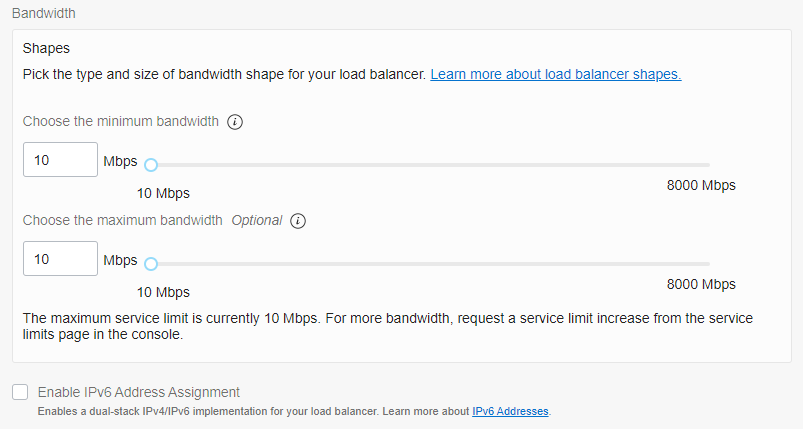
Bandwidth: Here we use the default
-
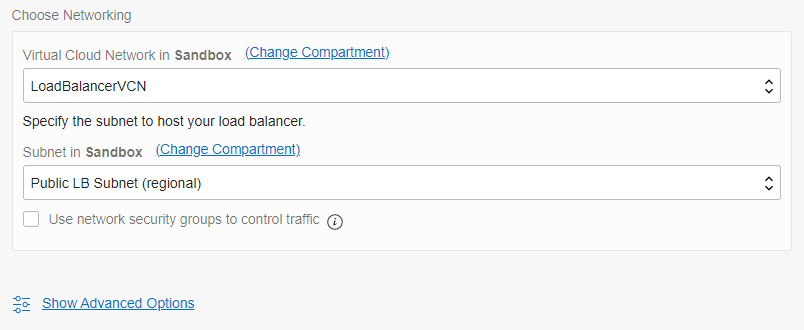
Choose Networking: Select the previously created VCN and Subnet for LB testing
- VCN: LoadBalancerVCN
- Subnet: Public LB Subnet
-
-
Backend settings
-
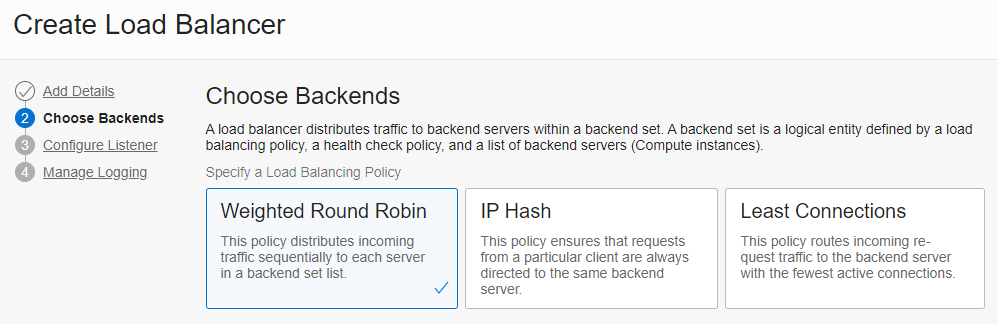
Load Balancing Policy: Select a distribution rule. Here we select round robin for further testing.
- Weighted Round Robin: Weighted Round Robin distribution method
- IP Hash: Distribution using the hash value of the client IP address
- Least Connections: Distribution based on the number of backend connections
-
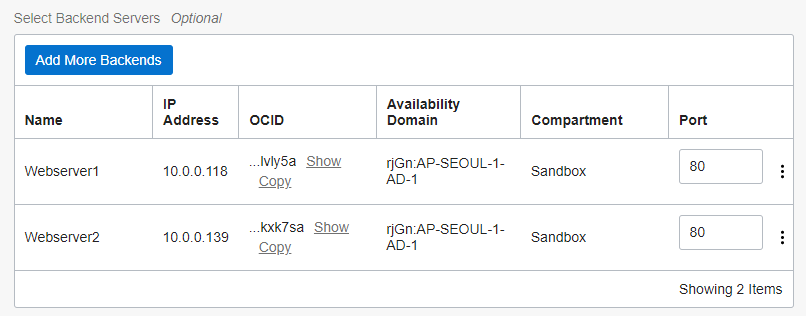
Add Backend
This is the part where the load balancer adds the target for load balancing. Add the 2 WebServers you created earlier.
-
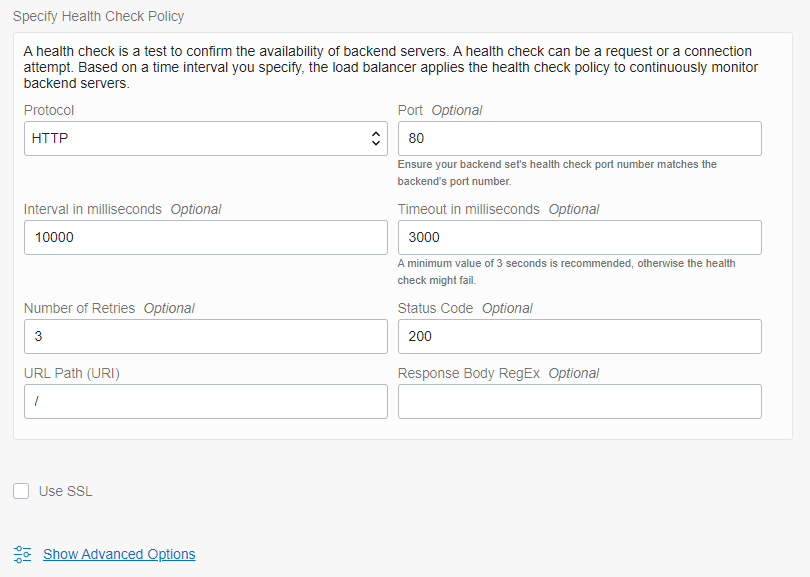
Health Check Policy: Use the default value as it will check health using the default port (80) of the current WebServer.
-
Use SSL: Currently, Apache HTTP Server is only serving HTTP, so it is not checked here.
-
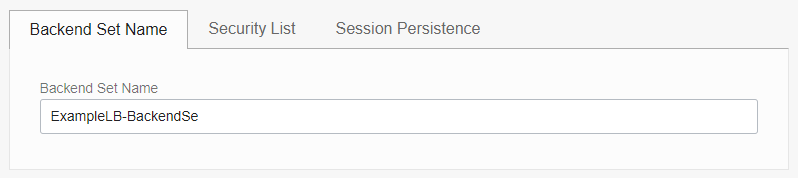
Advanced Option
-
Backend Set Name: change here to match your naming convention, eg ExampleLB-BackendSet
-
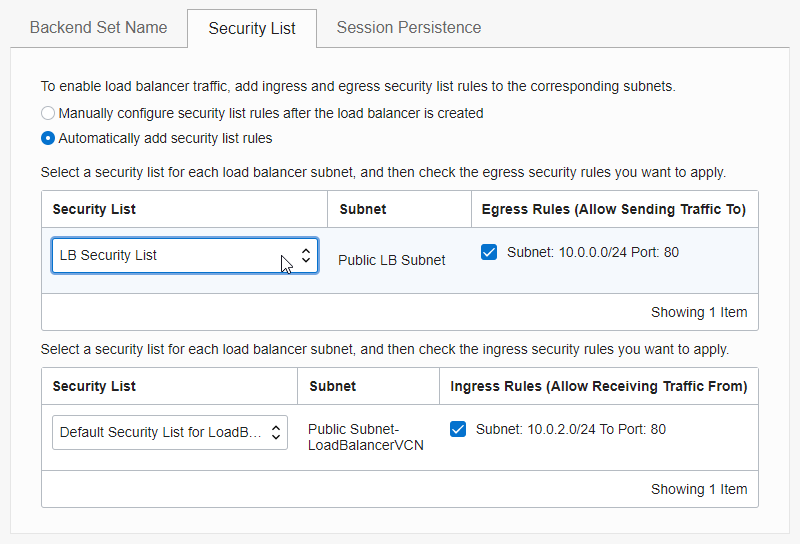
Security List: Security List update is required to open each service port between Client->LB and LB->Backend. By default, it is set to Auto, and you can change the Auto or Target Security List in the Advanced Options below. Select the additional LB Security List you created.
-
Session Persistence: When using persistence according to the session cookie value, the method is set and omitted here to check the smooth distribution test afterwards.
-
-
-
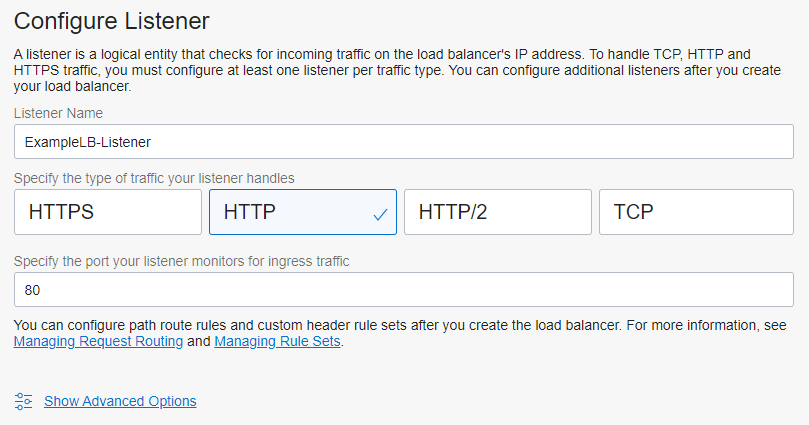
Configure Listener
- Listener Name: Enter a name, Ex) ExampleLB-Listener
- Specify the type of traffic your listener handles: select HTTP
- HTTP, HTTPS, HTTP/2 are optional options, but HTTPS, HTTP/2 selection requires additional setting of SSL certificate. HTTP is used here for testing purposes.
-
Manage Logging
- You can set the error log and access log to use the OCI Log service. First of all, it is not used here.
-
Click Submit to create the Load Balancer.
-
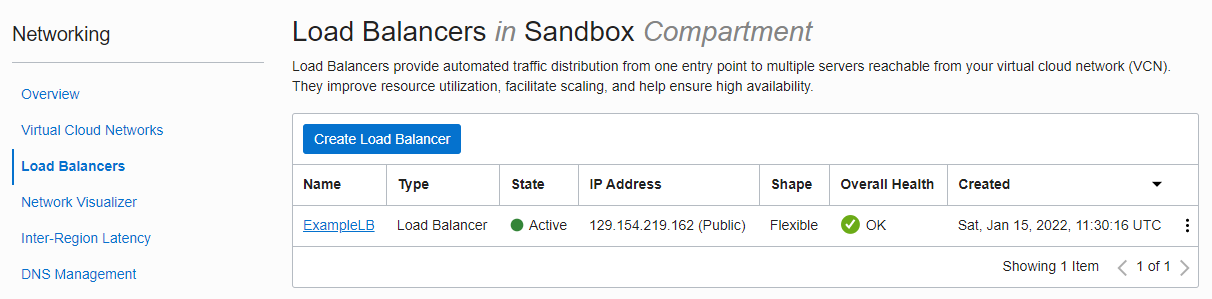
A little while after the Load Balancer is created, the health check of the backend server succeeds and the overall health becomes OK.
Check the Load Balancer creation result
-
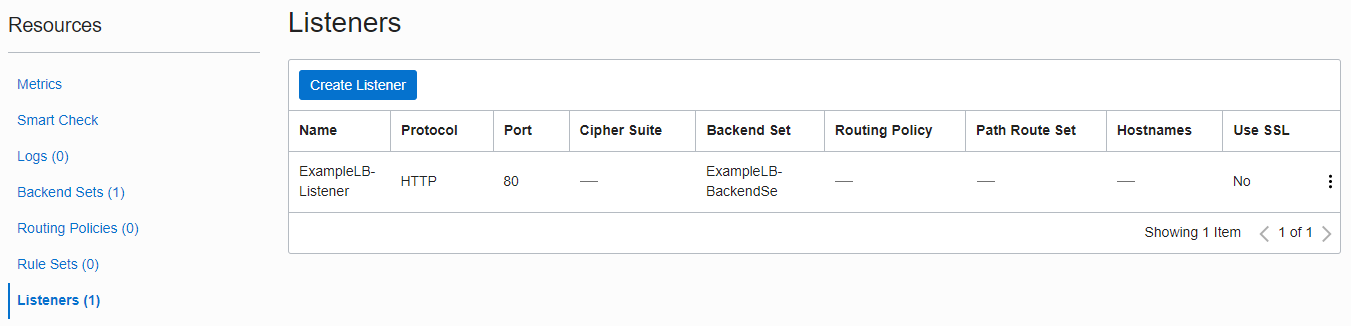
Click the created Load Balancer name to go to the detail screen.
-
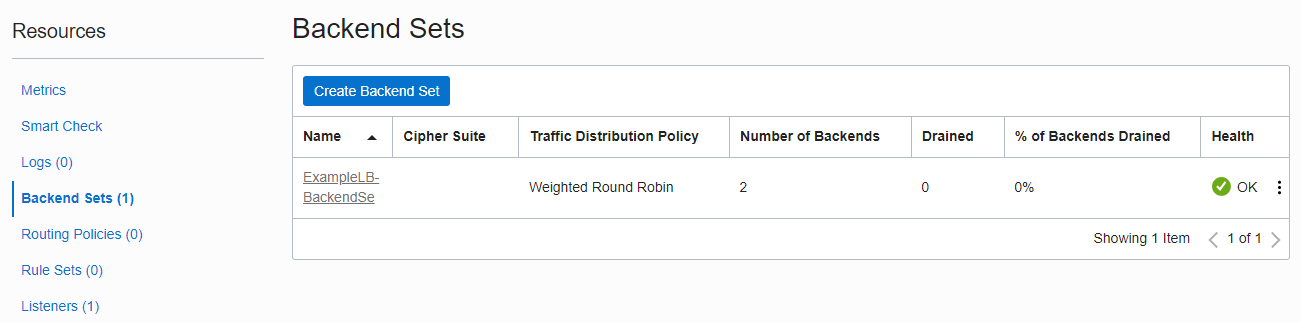
Backend Sets and Listeners are created based on the information entered during creation.
-
Support for updates such as adding distribution rules and backend servers.
- Name length is limited. 19 seems to be the max.
-
You can see that the listener is also created, and its settings support update.
Check the result of automatic update of the Security List
-
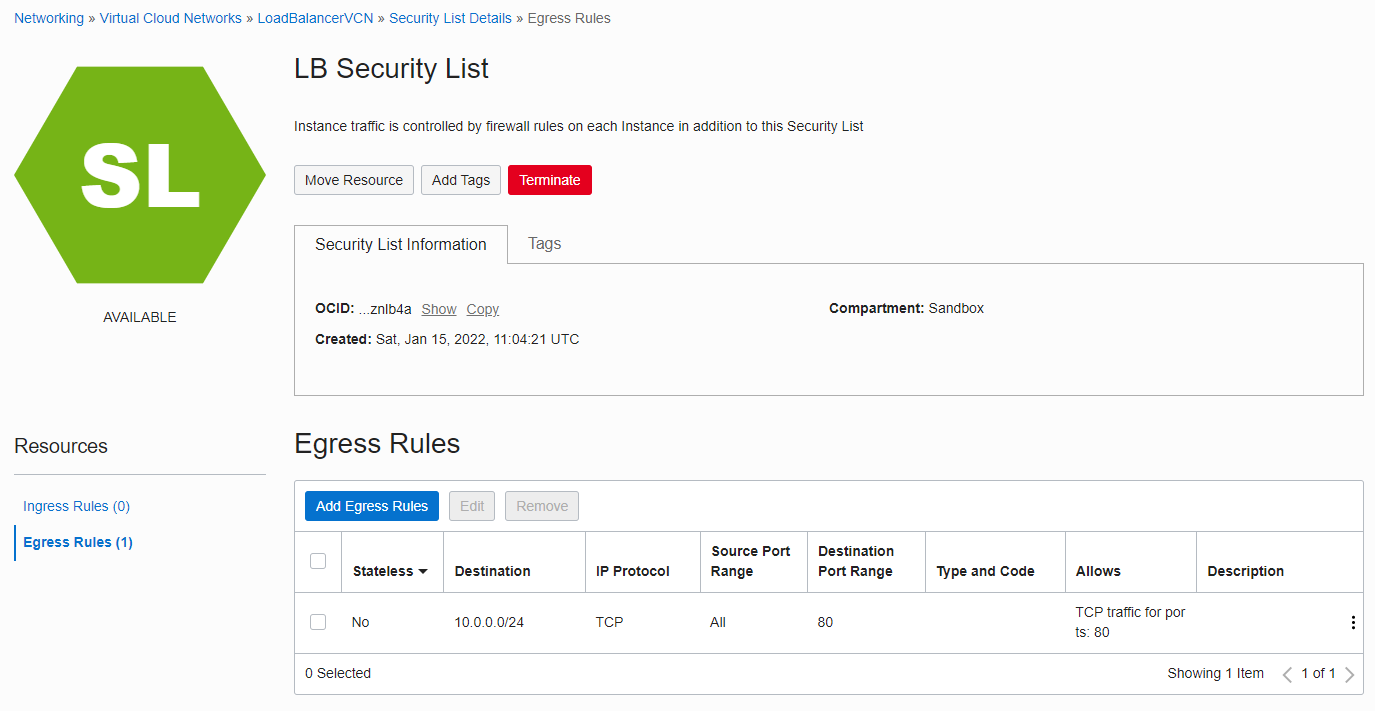
Go to the detail screen of LB Security List, which is the Security List of Load Balancer.
-
One Egress Rule has been added. You can see that 2 WebServers added with Add Backend Set and port 80 corresponding to service port 80, that is, port 80 of the corresponding subnet (10.0.0.0/24) are opened.
-
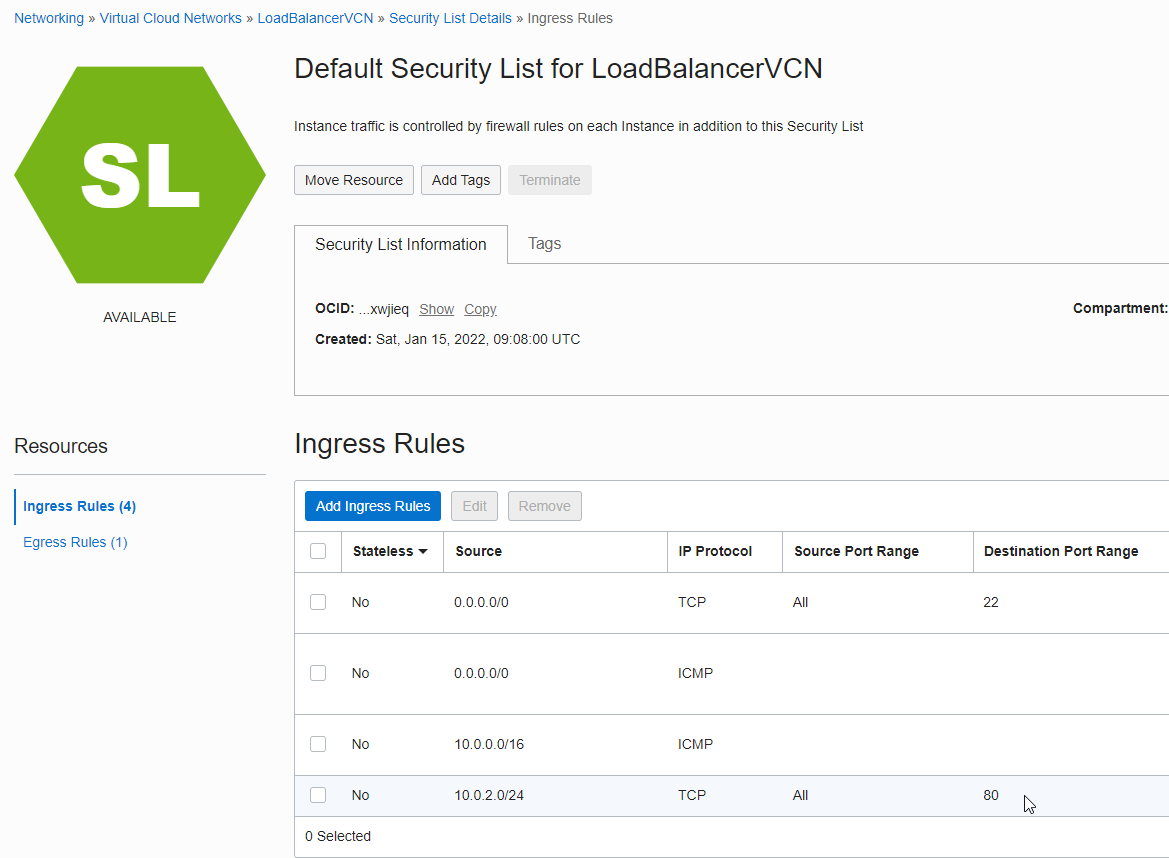
In the Default Security List, which is the security list of the subnet containing WebServer 2, the backend, a rule was added at the end to allow access to the WebServer port, 80, from the Public LB Subnet (10.0.2.0/24).
-
With the above 2 rules added automatically, 80 port communication between Load Balancer -> WebServer was opened. However, port 80 was not opened in the Ingress of the LB Security List so that real clients could come to the Load Balancer.
-
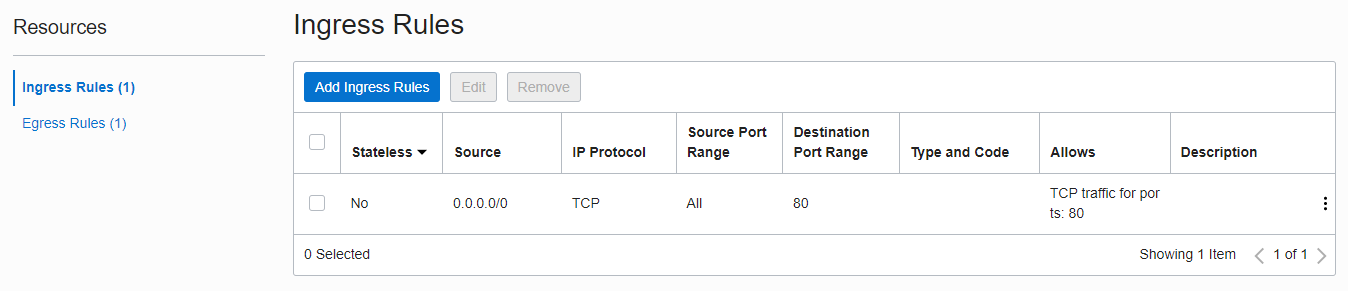
Return to the detail screen of the LB Security List again and set the rules for opening between Client -> Load Balancer. Add Ingress Rule to LB Security List as below.
As an individual, this article was written with my personal time. There may be errors in the content of the article, and the opinions in the article are personal opinions.