Warning
This content has been generated by machine translation. The translations are automated and have not undergone human review or validation.
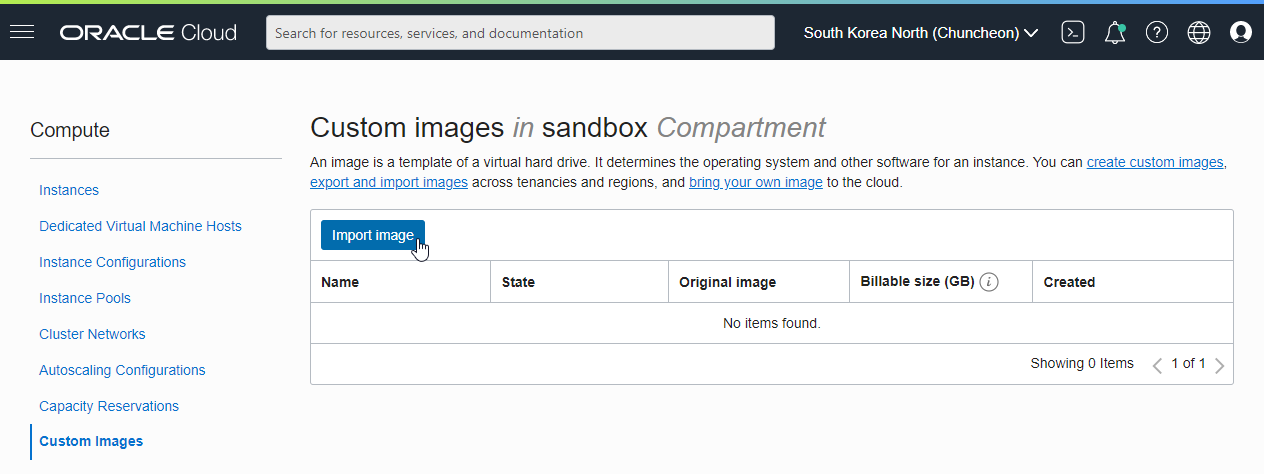
9.3 Custom Image Export/Import
Custom Image provides import and export functions. The Custom Image belongs to the Comparment within the Region, and to copy it to another Compartment or to another Region, it is exported to Object Storage and then imported again at the desired location.
For the description of creating a Bucket in Object Storage and pre-authentication, see [7. Using Object Storage] (/oci/chapter07/).
Custom Image Export
-
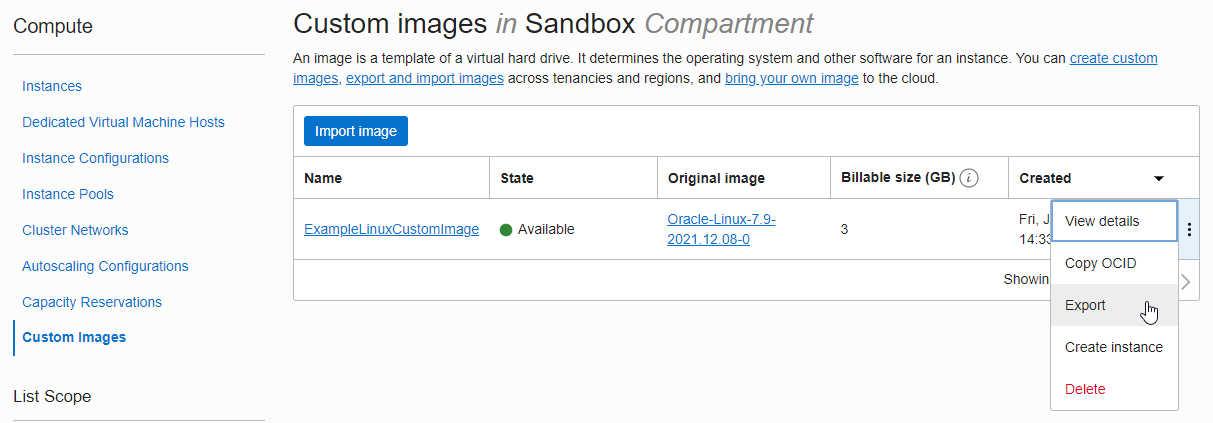
Open the navigation menu in the OCI console. Go to Compute > Custom Images.
-
Click the image you want to export.
-
Click Export Image in the action menu to the right of the target image.
-
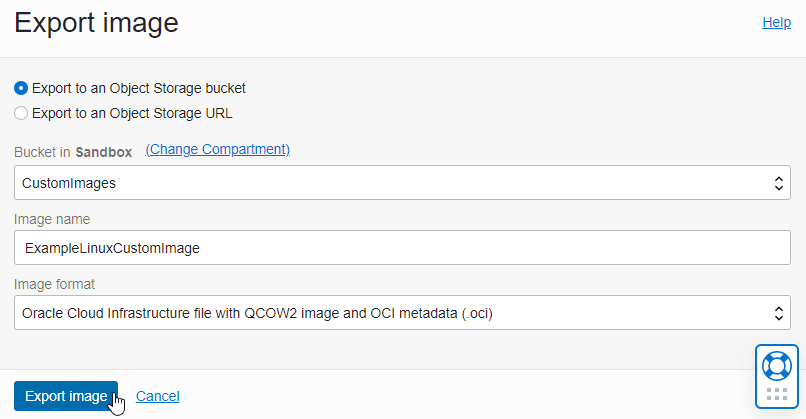
Export can be done in two ways, and the format is exported in OCI format.
- Object Storage Bucket: Export as an Object Storage Bucket within the logged-in Tenancy. Select the target compartment and bucket.
- Object Storage URL: Export through URL. Exporting to another Tenancy becomes possible.
-
Enter your Export information and click Export Image at the bottom.
-
Bucket name: Select the target Object Storage Bucket name, if it does not exist, create it in advance.
-
Image name: Ex) ExampleLinuxCustomImage
-
Image format: Select .oci format
-
-
You can check the export start and end times by going to the detail screen of Custom Image and looking at the Work requests below. You can see that it took about 8 minutes.

-
If you go to the target Object Storage Bucket, you can see what has been exported.
As you can see in the picture, 1.28 GiB took about 8 minutes.

Custom Image Import
Object Pre-Authenticated Request setting
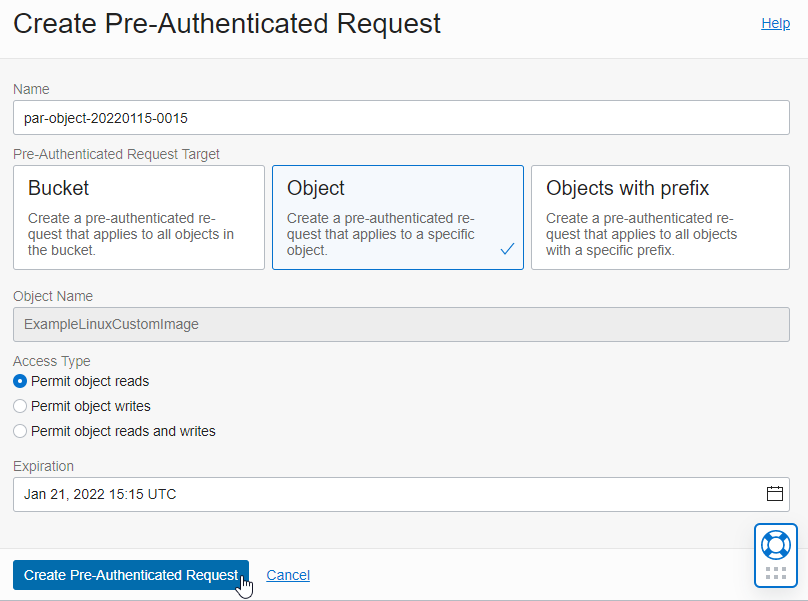
In order to import from the Object Storage URL, pre-authentication (Pre-Authenticated Request) that allows the target object to access without additional authentication must be set. Public Bucket is not supported as of the date of creation.
-
Create a temporary pre-authentication link with read access to the Custom Image Object through the Create Pre-Authenticated Request command in the right action menu of the Custom Image Object.
-
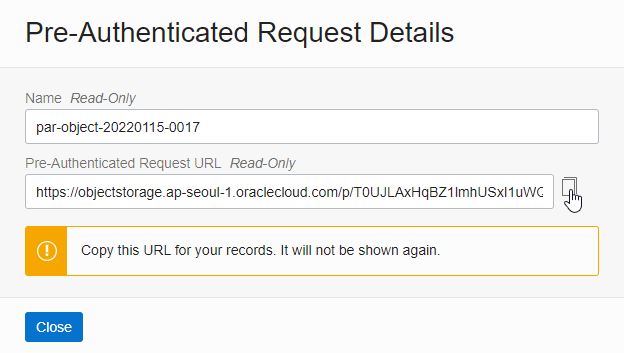
Copy the link created below.
-
Import from another Region or another Cloud Account
-
Open the navigation menu in the OCI console. Go to Compute > Custom Images.
-
In the upper right corner, change to the region you want to import and click Import Image
-
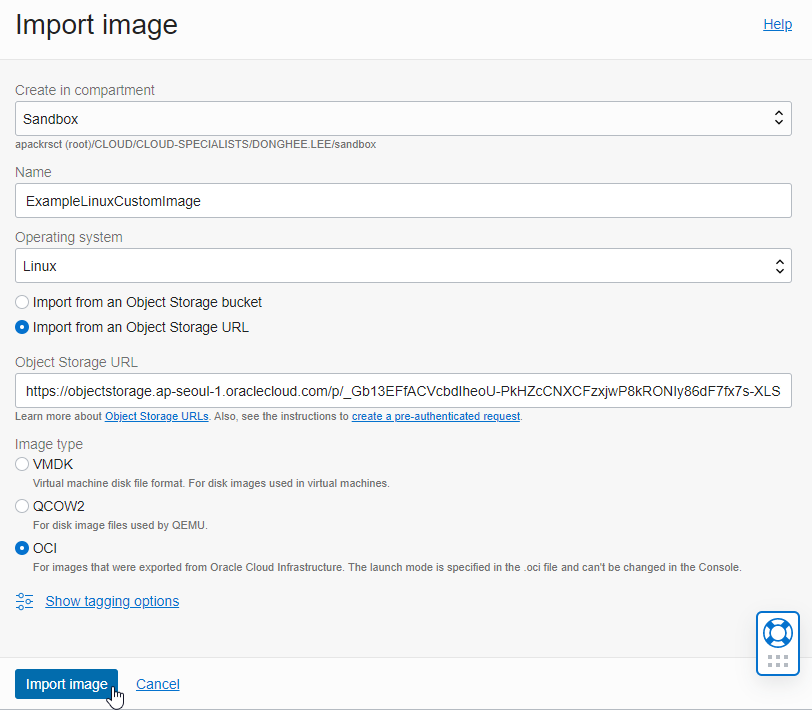
Import input information
-
Name: Enter the image name
-
Operating system: Select Linux
-
Object Storage URL: Copy the Object Storage URL of the previously copied image
-
Image type: Select OCI
-
-
After entering information, click Import image at the bottom
-
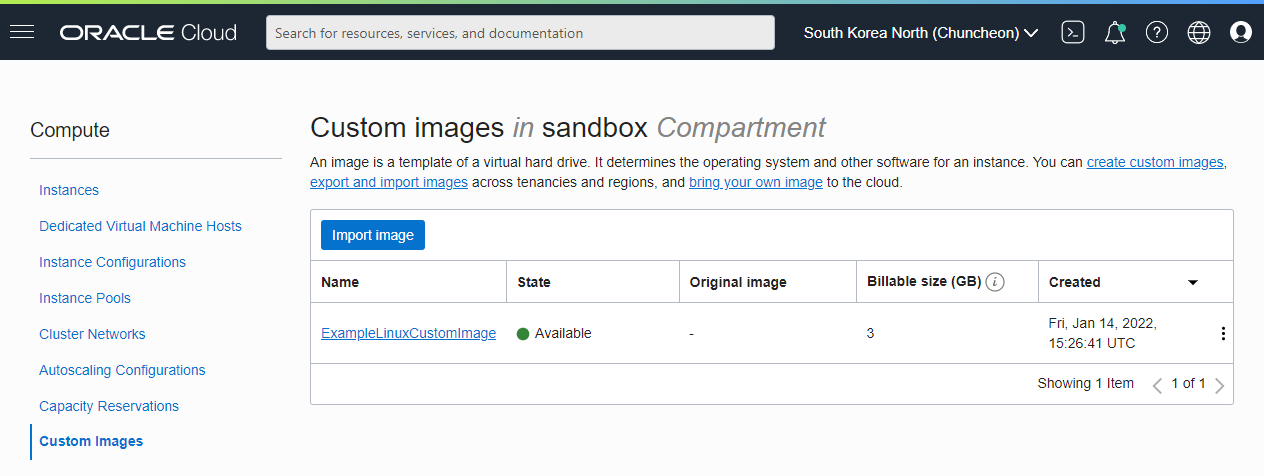
Go to the detail screen of the custom image being imported and see the work requests below to see the progress, and when the import is complete, you can check the start and end times. You can see it took about 10 minutes.

-
Import is complete.
As an individual, this article was written with my personal time. There may be errors in the content of the article, and the opinions in the article are personal opinions.