Warning
This content has been generated by machine translation. The translations are automated and have not undergone human review or validation.
8.2 Mounting and using FSS (File Storage Service) on a Linux VM
Constraints
Create Subnet
-
Open the navigation menu in the OCI console. Go to Networking > Virtual Cloud Networks.
-
Click on ExampleVCN, the VCN you created earlier.
-
Click Create Subnets
-
Enter creation information: Enter only bold text fields and use default values for the rest.
- Name: Enter a name, FSS Subnet
- Subnet Type: Select the default REGIONAL
- REGIONAL: This is a subnet that is globally located in the region, and has the advantage of being able to use the IP as it is in case of a Failover to another AD.
- AVAILABILITY DOMAIN-SPECIFIC: Subnet created in AD
- CIDR Block: 10.0.2.0/24
- Route Table: Select Default Route Table
- Subnet Access: Select Public Subnet
- DHCP Options: Select Default DHCP Options
-
Scroll to the bottom and click Create Subnet
-
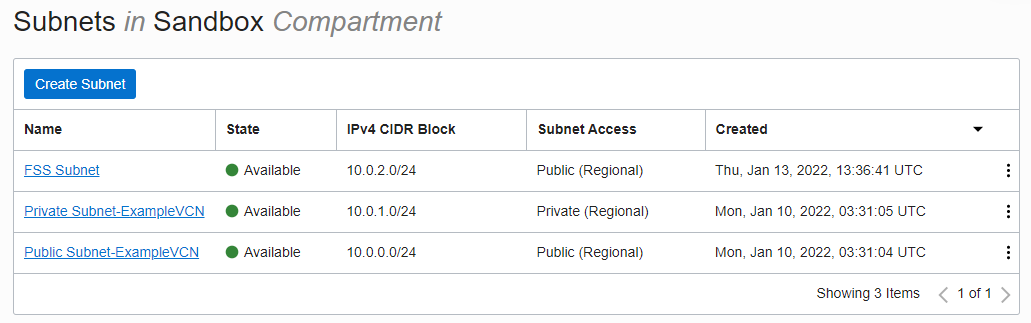
FSS Subnet creation complete
Create a Security List for File Storage Service
In order to use File Storage Service on FFS Subnet (10.0.2.0/24) from VM on ExampleVCN’s Public Subnet (10.0.0.0/24), the relevant port needs to be opened. Let’s create a Security List for this.
-
Left click Resources > Security Lists
-
Click Create Security List
-
Enter creation information
-
Name: Enter a name, FSS Security List
-
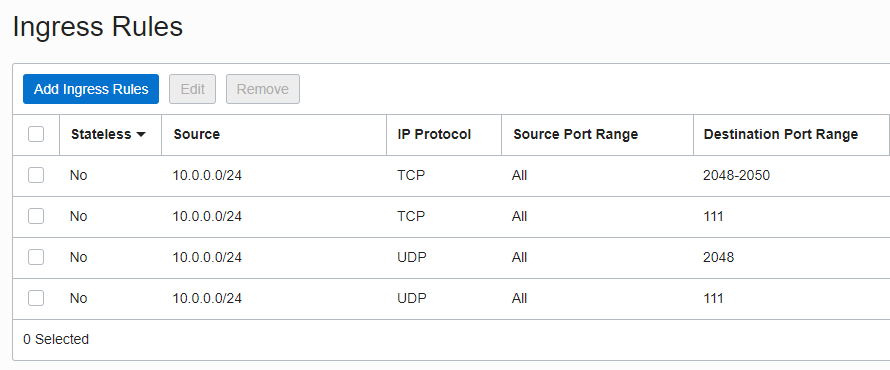
Allow Rules for Ingress: Enter as below table to open as VM target on Public Subnet (10.0.0.0/24)
Stateless Source IP Protocol Source Port Range Destination Port Range No 10.0.0.0/24 TCP All 2048-2050 No 10.0.0.0/24 TCP All 111 No 10.0.0.0/24 UDP All 2048 No 10.0.0.0/24 UDP All 111
-
-
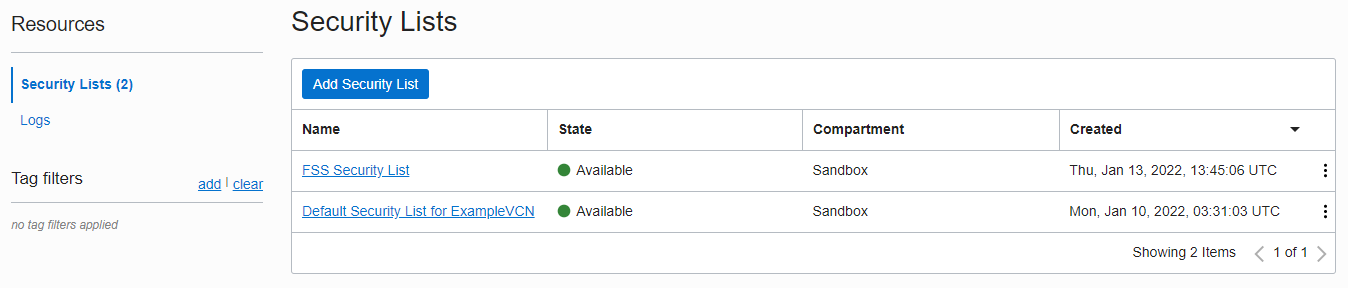
Creation complete
Apply Security List to Subnet
-
Go to the detail page of the FSS Subnet you created earlier.
-
Add the FSS Security you just created to the Security List of the FSS Subnet.
Create File System
-
Open the navigation menu in the OCI console. Go to Storage > File Storage > File Systems.
-
Click Create File System
-
Enter creation information
-
You can use the default, but change the name for convenience.
-
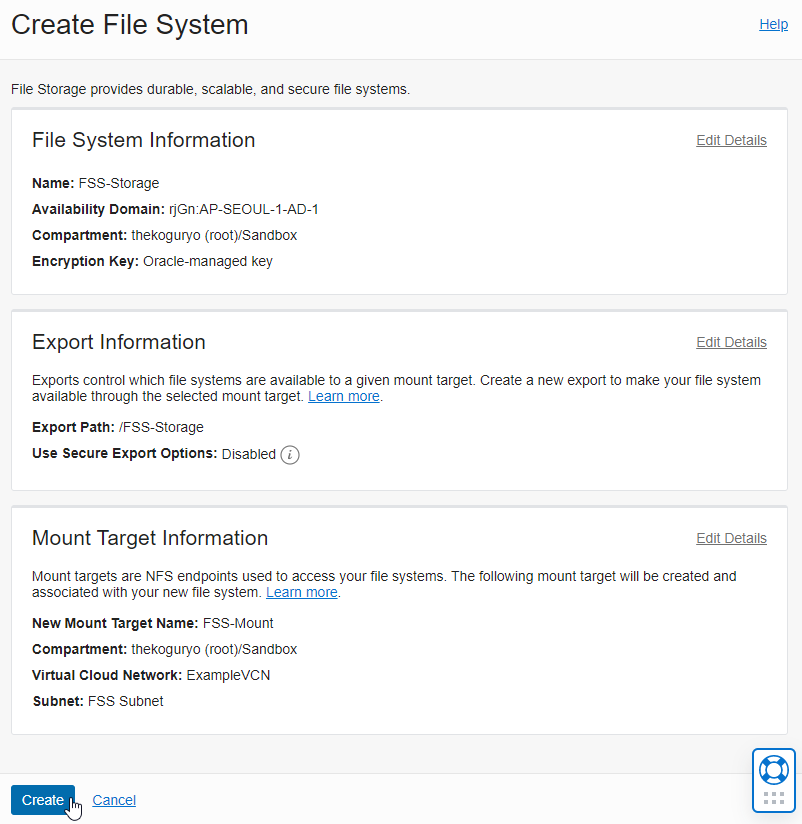
File System Information
- Name: Click Edit Details on the right to change the name to the desired name, enter FSS-Storage
-
Export Information : Use default value
-
Mount Target Information
- New Mount Target Name: Click Edit Details on the right to change the name to the desired name, enter FSS-Mount
- Virtual Cloud Network: ExampleVCN
- Subnet: FSS Subnet, select the subnet created for File Storage created earlier
-
Mount File System
-
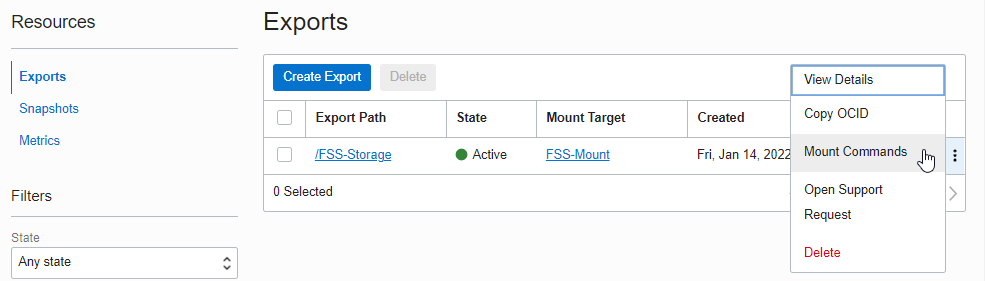
Click Action Menu on the right side of Export at the bottom of the created File System and click Mount Commands.
-
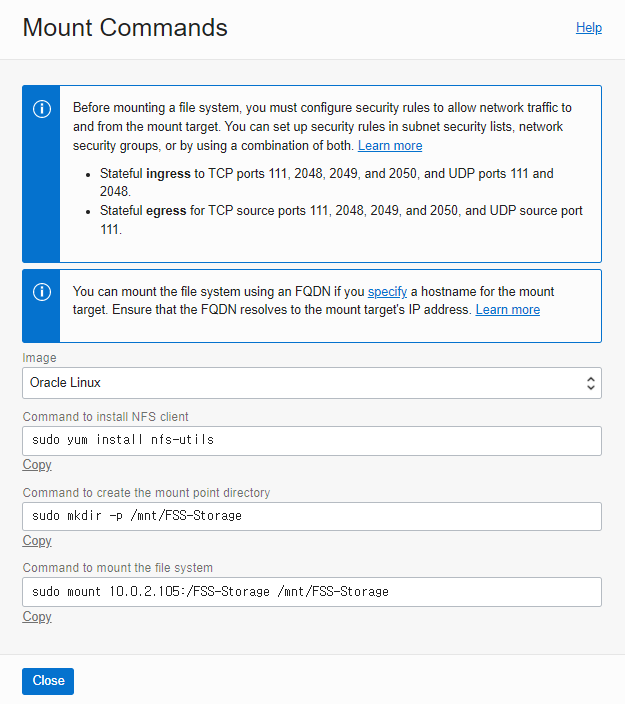
Check the commands required to mount the FSS on the client.
Select the OS from the image. The figure below is based on Oracle Linux.
-
Connect to the Compute Instance on the Public Subnet (10.0.0.0/24) of ExampleVCN created in the previous exercise.
-
Execute the Mount Commands you checked in the OCI console in order.
-
Command example
# Install NFS client sudo yum install nfs-utils # create mount folder sudo mkdir -p /mnt/FSS-Storage # mount sudo mount 10.0.2.105:/FSS-Storage /mnt/FSS-Storage -
Result check and test
# Check the mount result
df -h
# change permissions
sudo chmod 777 /mnt/FSS-Storage
# Confirm file creation
echo 'Hello File Storage' > /mnt/FSS-Storage/hello1.txt
ls -la /mnt/FSS-Storage/
-
-
Example Results
ubuntu@NOTEBOOK-WORK:~/.ssh$ ssh -i mysshkey opc@152.67.220.47 Last login: Fri Jan 14 01:57:59 2022 from 223.62.21.154 [opc@examplelinuxinstance ~]$ # Install NFS client [opc@examplelinuxinstance ~]$ sudo yum install nfs-utils Loaded plugins: langpacks, ulninfo Package 1:nfs-utils-1.3.0-0.68.0.1.el7.2.x86_64 already installed and latest version Nothing to do [opc@examplelinuxinstance ~]$ # Create mount folder [opc@examplelinuxinstance ~]$ sudo mkdir -p /mnt/FSS-Storage [opc@examplelinuxinstance ~]$ # mount [opc@examplelinuxinstance ~]$ sudo mount 10.0.2.105:/FSS-Storage /mnt/FSS-Storage [opc@examplelinuxinstance ~]$ # Check the mount result [opc@examplelinuxinstance ~]$ df -h Filesystem Size Used Avail Use% Mounted on devtmpfs 7.7G 0 7.7G 0% /dev tmpfs 7.7G 0 7.7G 0% /dev/shm tmpfs 7.7G 8.8M 7.7G 1% /run tmpfs 7.7G 0 7.7G 0% /sys/fs/cgroup /dev/sda3 39G 3.9G 35G 11% / /dev/sda1 200M 7.5M 193M 4% /boot/efi tmpfs 1.6G 0 1.6G 0% /run/user/0 tmpfs 1.6G 0 1.6G 0% /run/user/994 tmpfs 1.6G 0 1.6G 0% /run/user/1000 10.0.2.105:/FSS-Storage 8.0E 0 8.0E 0% /mnt/FSS-Storage [opc@examplelinuxinstance ~]$ # Confirm file creation [opc@examplelinuxinstance ~]$ sudo chmod 777 /mnt/FSS-Storage [opc@examplelinuxinstance ~]# echo 'Hello File Storage' > /mnt/FSS-Storage/hello1.txt [opc@examplelinuxinstance ~]# ls -la /mnt/FSS-Storage/ total 9 drwxr-xr-x. 2 root root 1 Jan 14 01:59 . drwxr-xr-x. 3 root root 25 Jan 14 01:59 .. drwxr-xr-x. 2 root root 0 Jan 14 01:59 .snapshot -rw-r--r--. 1 opc opc 19 Jan 14 01:59 hello1.txt -
Update /etc/fstab to mount automatically after VM restart.
#
# /etc/fstab
# Created by anaconda on Wed Dec 1 01:55:42 2021
...

10.0.2.105:/FSS-Storage /mnt/FSS-Storage nfs defaults,nofail,nosuid,resvport 0 0
As an individual, this article was written with my personal time. There may be errors in the content of the article, and the opinions in the article are personal opinions.