Warning
This content has been generated by machine translation. The translations are automated and have not undergone human review or validation.
3.4 Creating a Linux Instance
tip
-
In the OCI Console, open the navigation menu. Navigate to the Compute > Instances topic.
-
Verify the Region where you want to create the instance and click Create Instance.
-
Enter Generation Information
-
Basic Information
- Name: Enter a name, for example, “ExampleLinuxInstance”
- Create in compartment: Select the Compartment to be located, select the sandbox that you created above
-
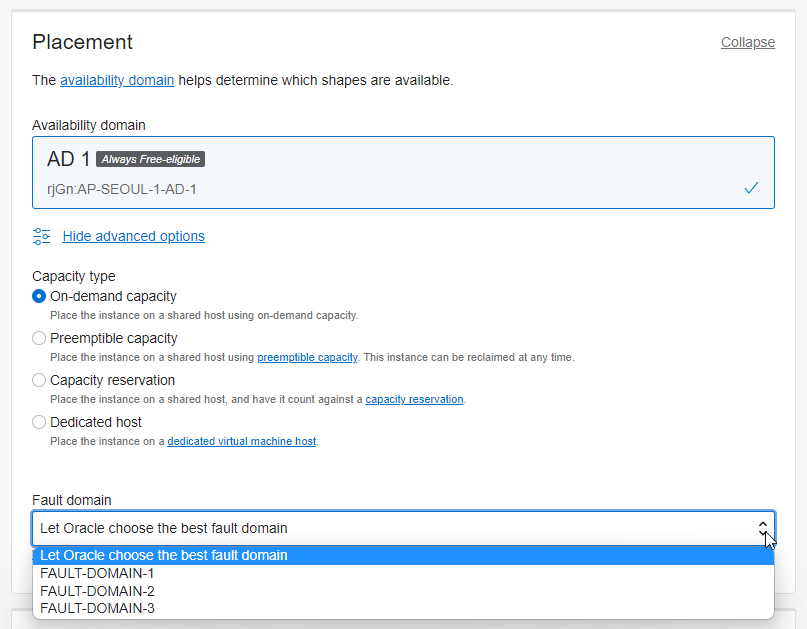
Placement
Because Seoul and Chuncheon are one AD, Placement is the default. Click Edit to the right to view the detailed options as shown below, and you can also specify Fault Domains within your AD.
-
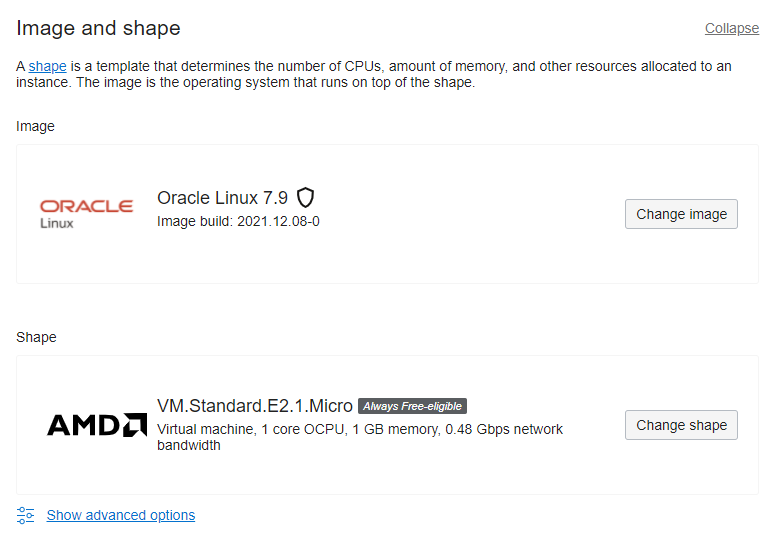
Image and Shape
Click Edit to the right to change the OS image and Shape settings.
-
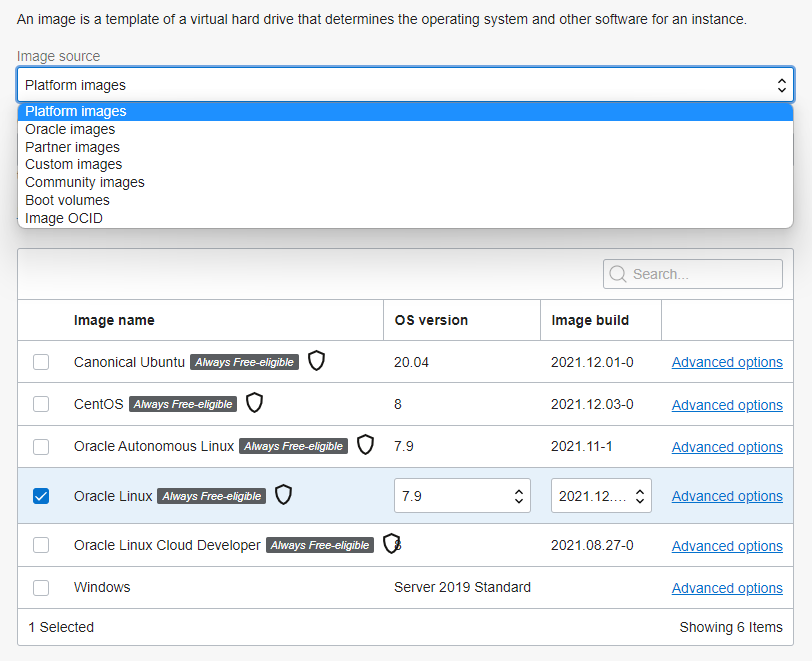
Image Change
You can use the default OS provided by your platform, including Oracle Linux, Ubuntu, CentOS, and Windows, and select pre-built package images provided by Oracle and our partners. Use default selected Oracle Linux here.
-
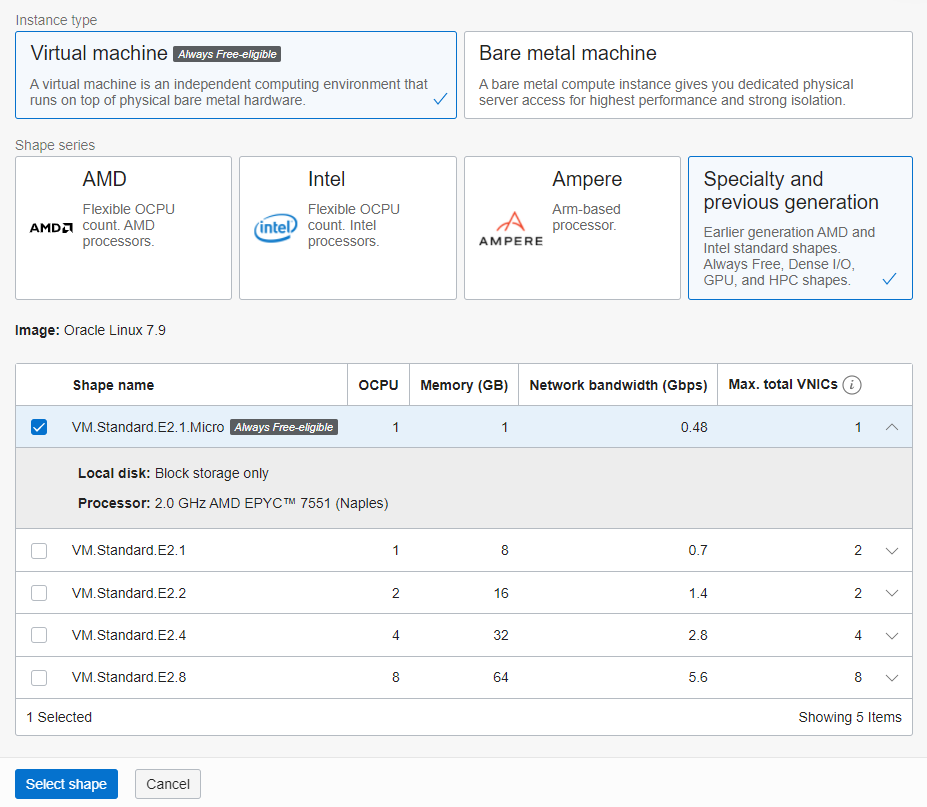
Shape Change
Shape is a template for CPU, Memory. Select VM, Baremetal or not, CPU manufacturer, and available Shape as shown in the figure below. Availability of Shape may vary depending on whether you are a free account, buyer, or region. In this case, select the default selected VM.Standard.E2.1.Micro. As shown in the Always Free-eligible tag, this type is always free within the instances that Always Free offers.
-
Networking
Select the Public Subnet of ExampleVCN you created earlier. VMs on a public subnet are given a public IP by default. Edit as needed to make corrections.

-
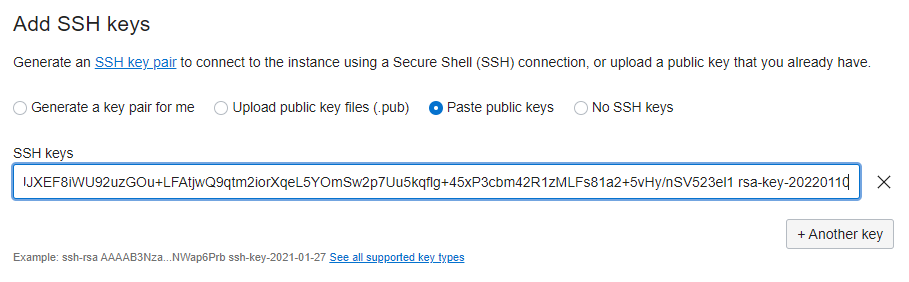
Add SSH Keys
-
Enter the public key of the SSH Key used to SSH into the VM. Paste the Public Key you created with SSH-keygen or PuTTY Key Generator in the previous chapter.
-
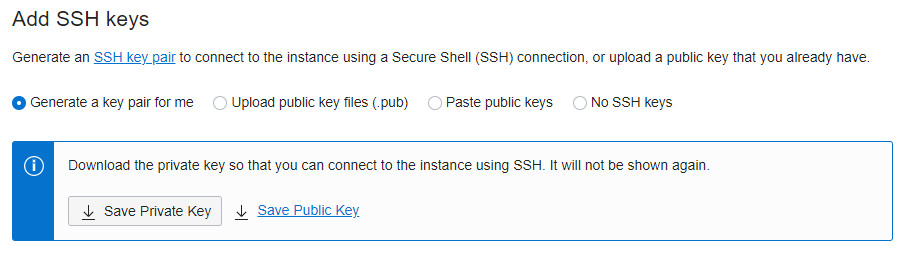
Generate a key pair for me: You can also use an automatically generated key if you did not generate an SSH key in advance. If you use this option, download and keep the private keys, public keys.
-
-
Boot volume: You can change the size and now accept the default without any setup.
-
Advanced Options
-
You can select the settings below directly from the Advanced Options. Use any default for now.
- Management: Cloud-init allows you to add custom scripts when creating VMs
- Available configuration: Live migration
- Oracle Cloud Agent: Can Change Default Installed Cloud Agent
-
-
Enter Creation Information and click Create
-
-
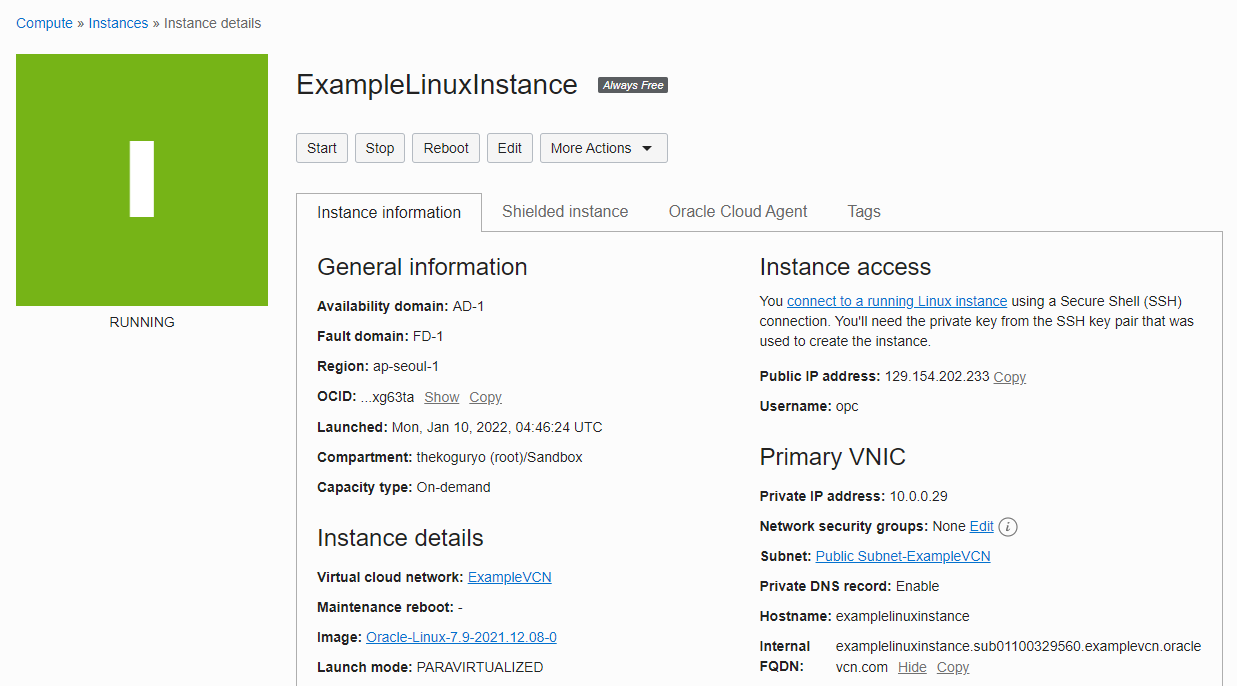
Created
Note that the instance will be in the PROVISIONING state after a few minutes and will be in the RUNNING state when the generation is complete.
As an individual, this article was written with my personal time. There may be errors in the content of the article, and the opinions in the article are personal opinions.